
Help Guide for Ordering
Below is a step-by-step guide to help you place your order on the online platform.
I strongly recommend using a computer to place your order.
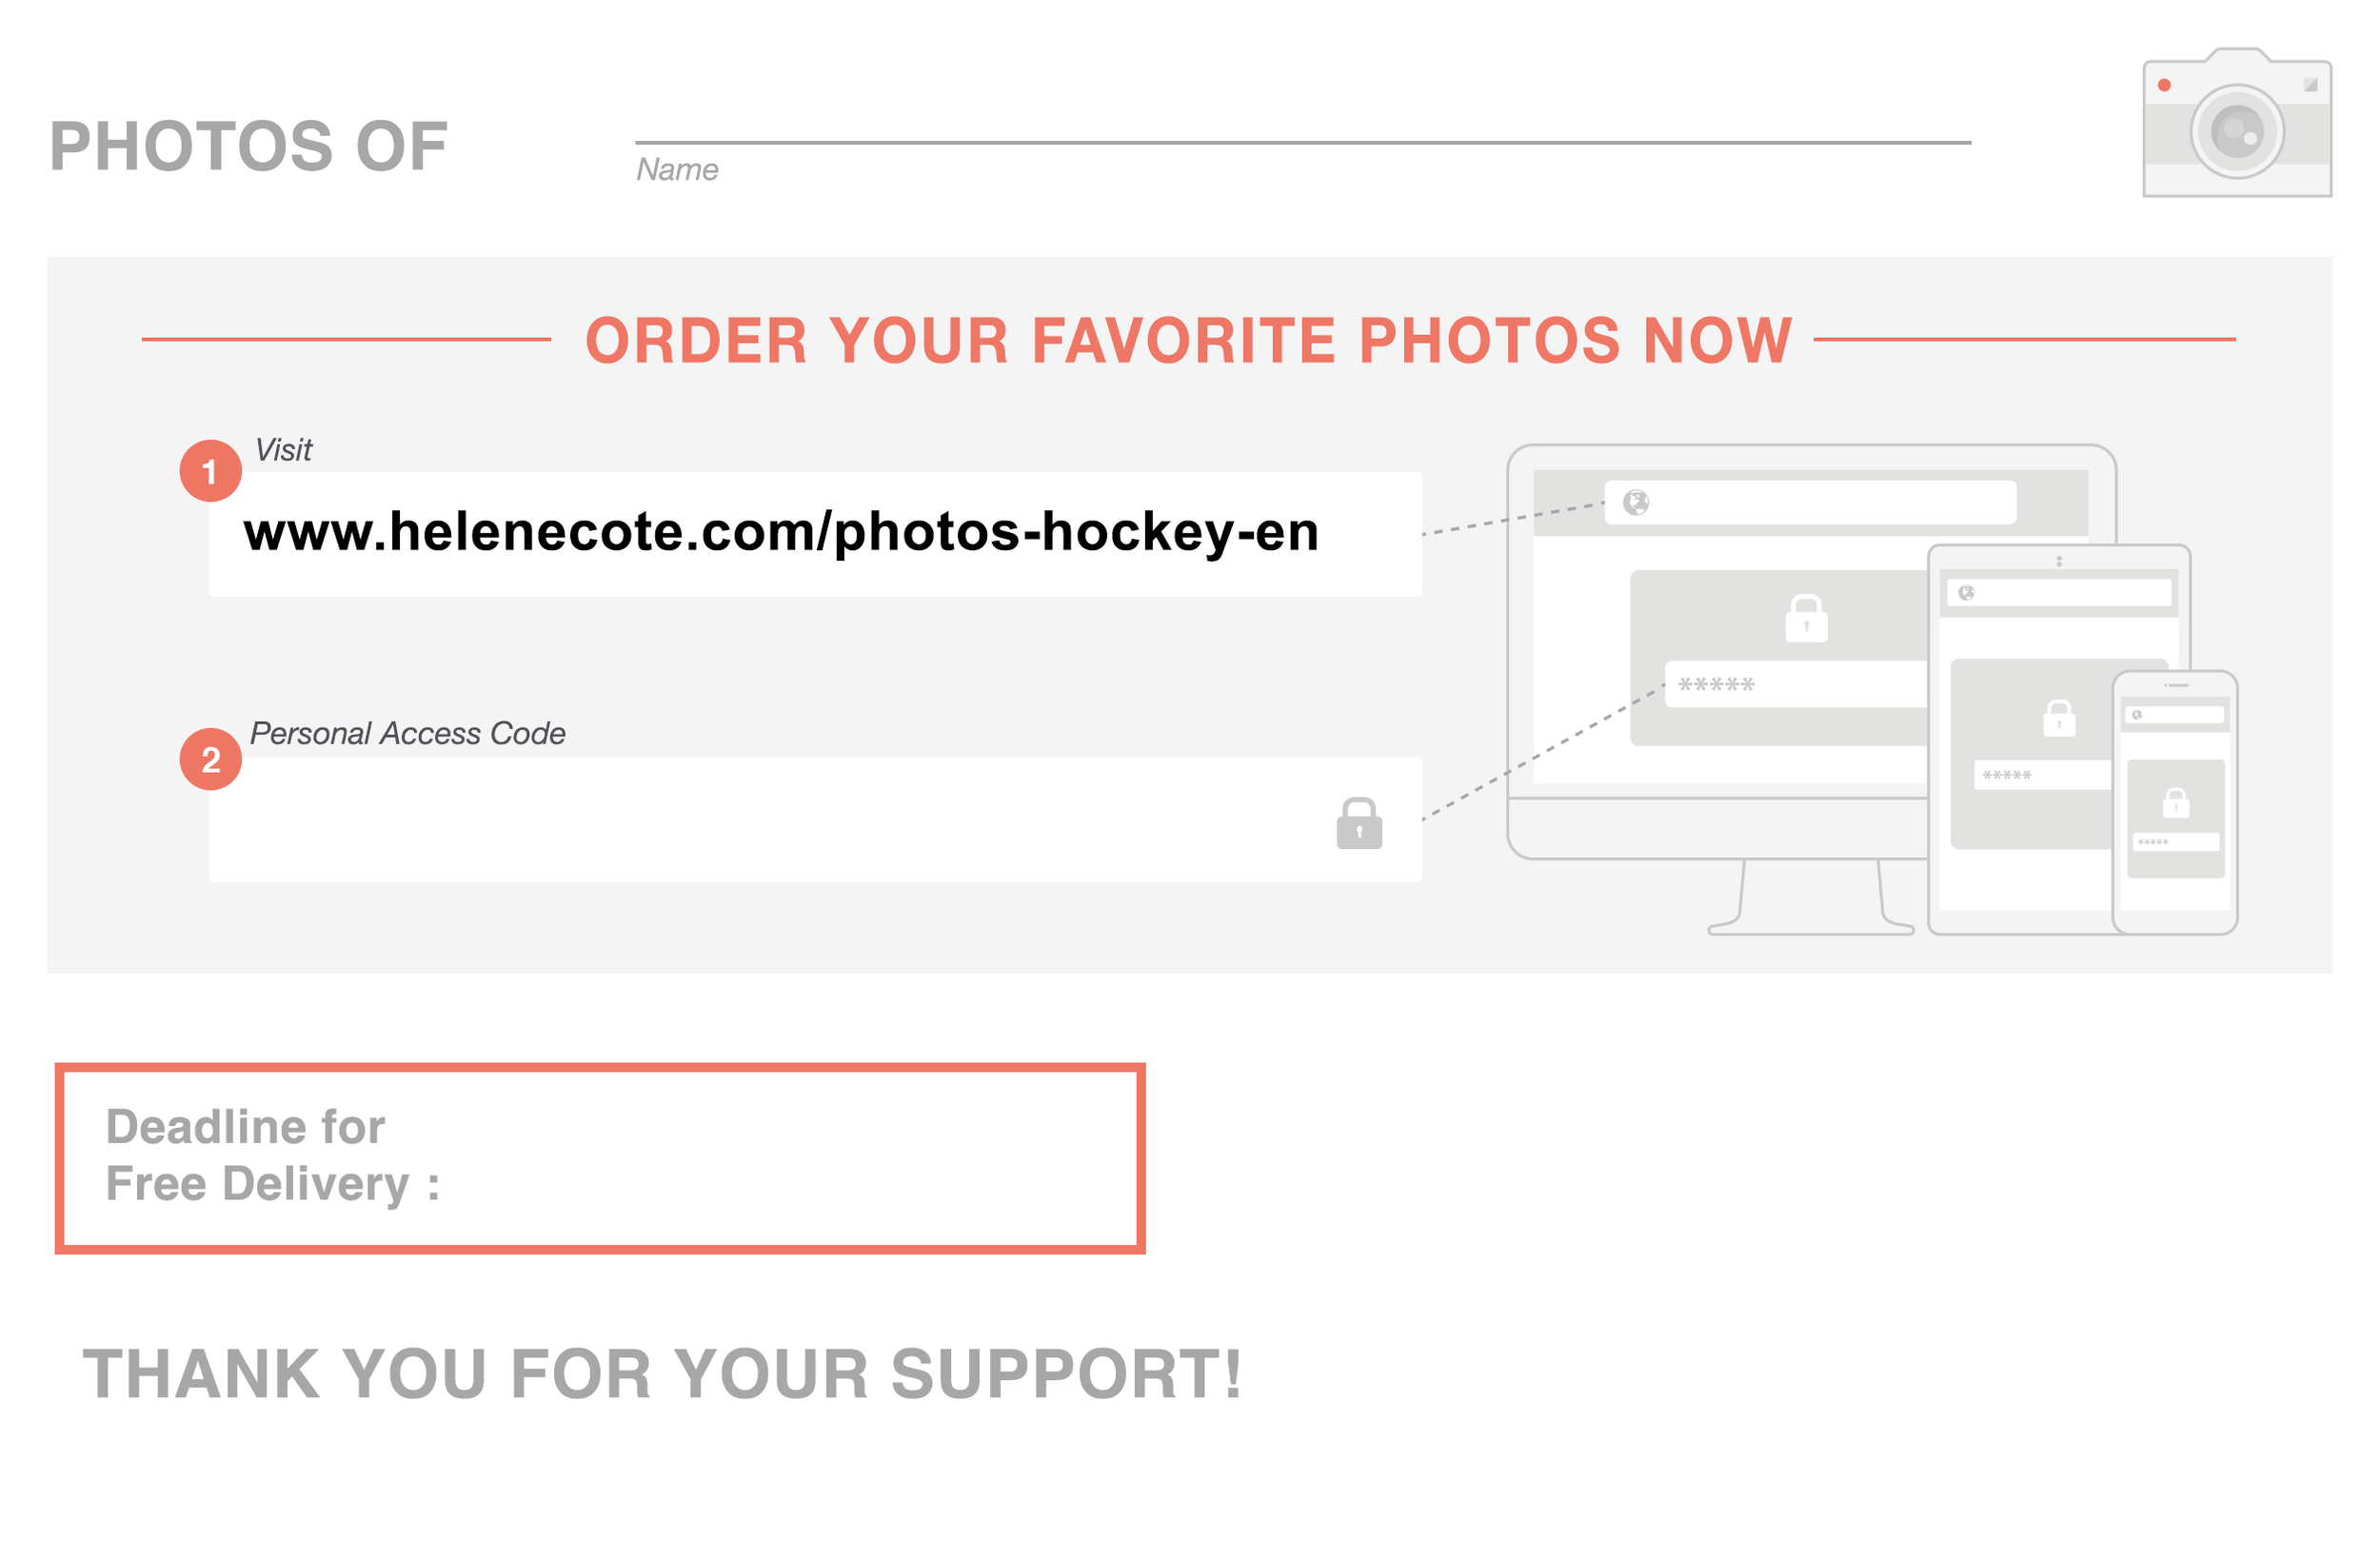
1- Access the Ordering Platform
The first step is to access the online ordering platform. To do so, go to the web address printed on the access card that will be given to you by your team manager.
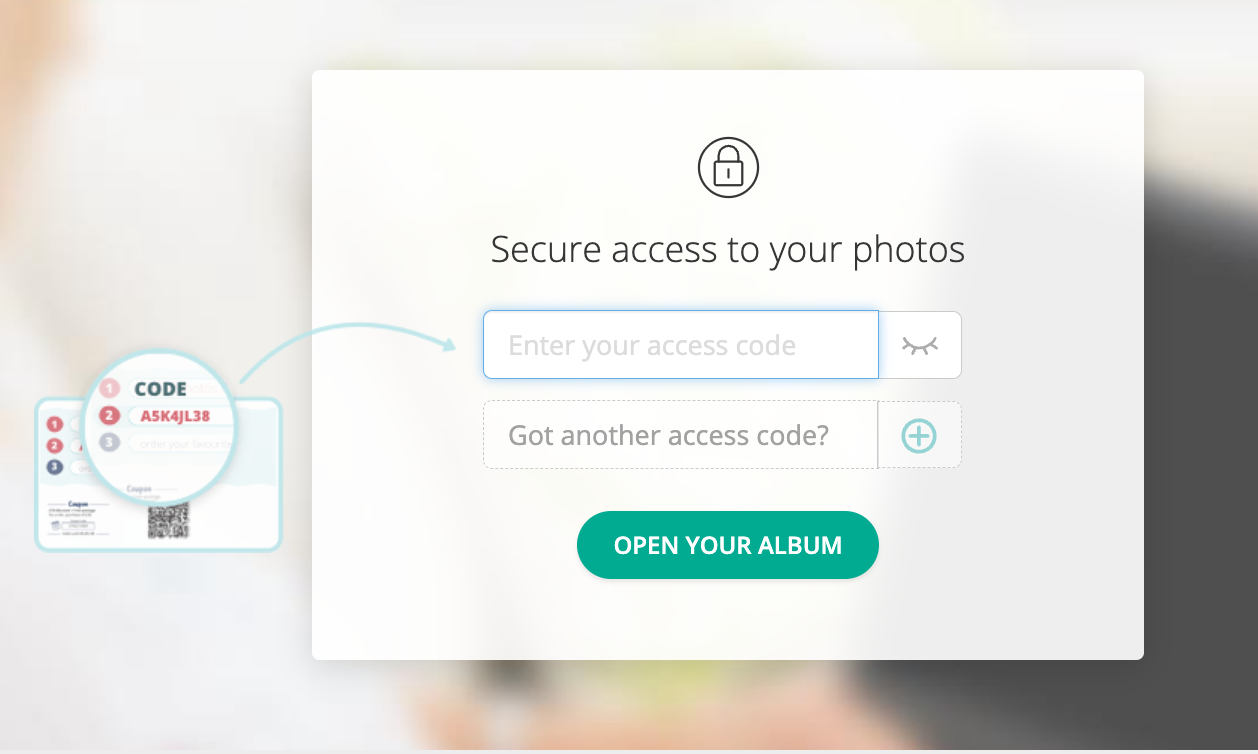
2- View the Photos
Enter the access code provided by your child.
If you have multiple codes, click on “Got another access code?” This will allow you to place a single order for all your children.
Then click “Open your album”
3 – ENTER YOUR INFORMATION
To continue logging in, please enter your name, email address, and phone number.
This information allows us to send you reminders about upcoming deadlines, as well as other important communications related to your order. Your email address is also required to allow you to log back into your personal account.
Then click the “See photos” button.

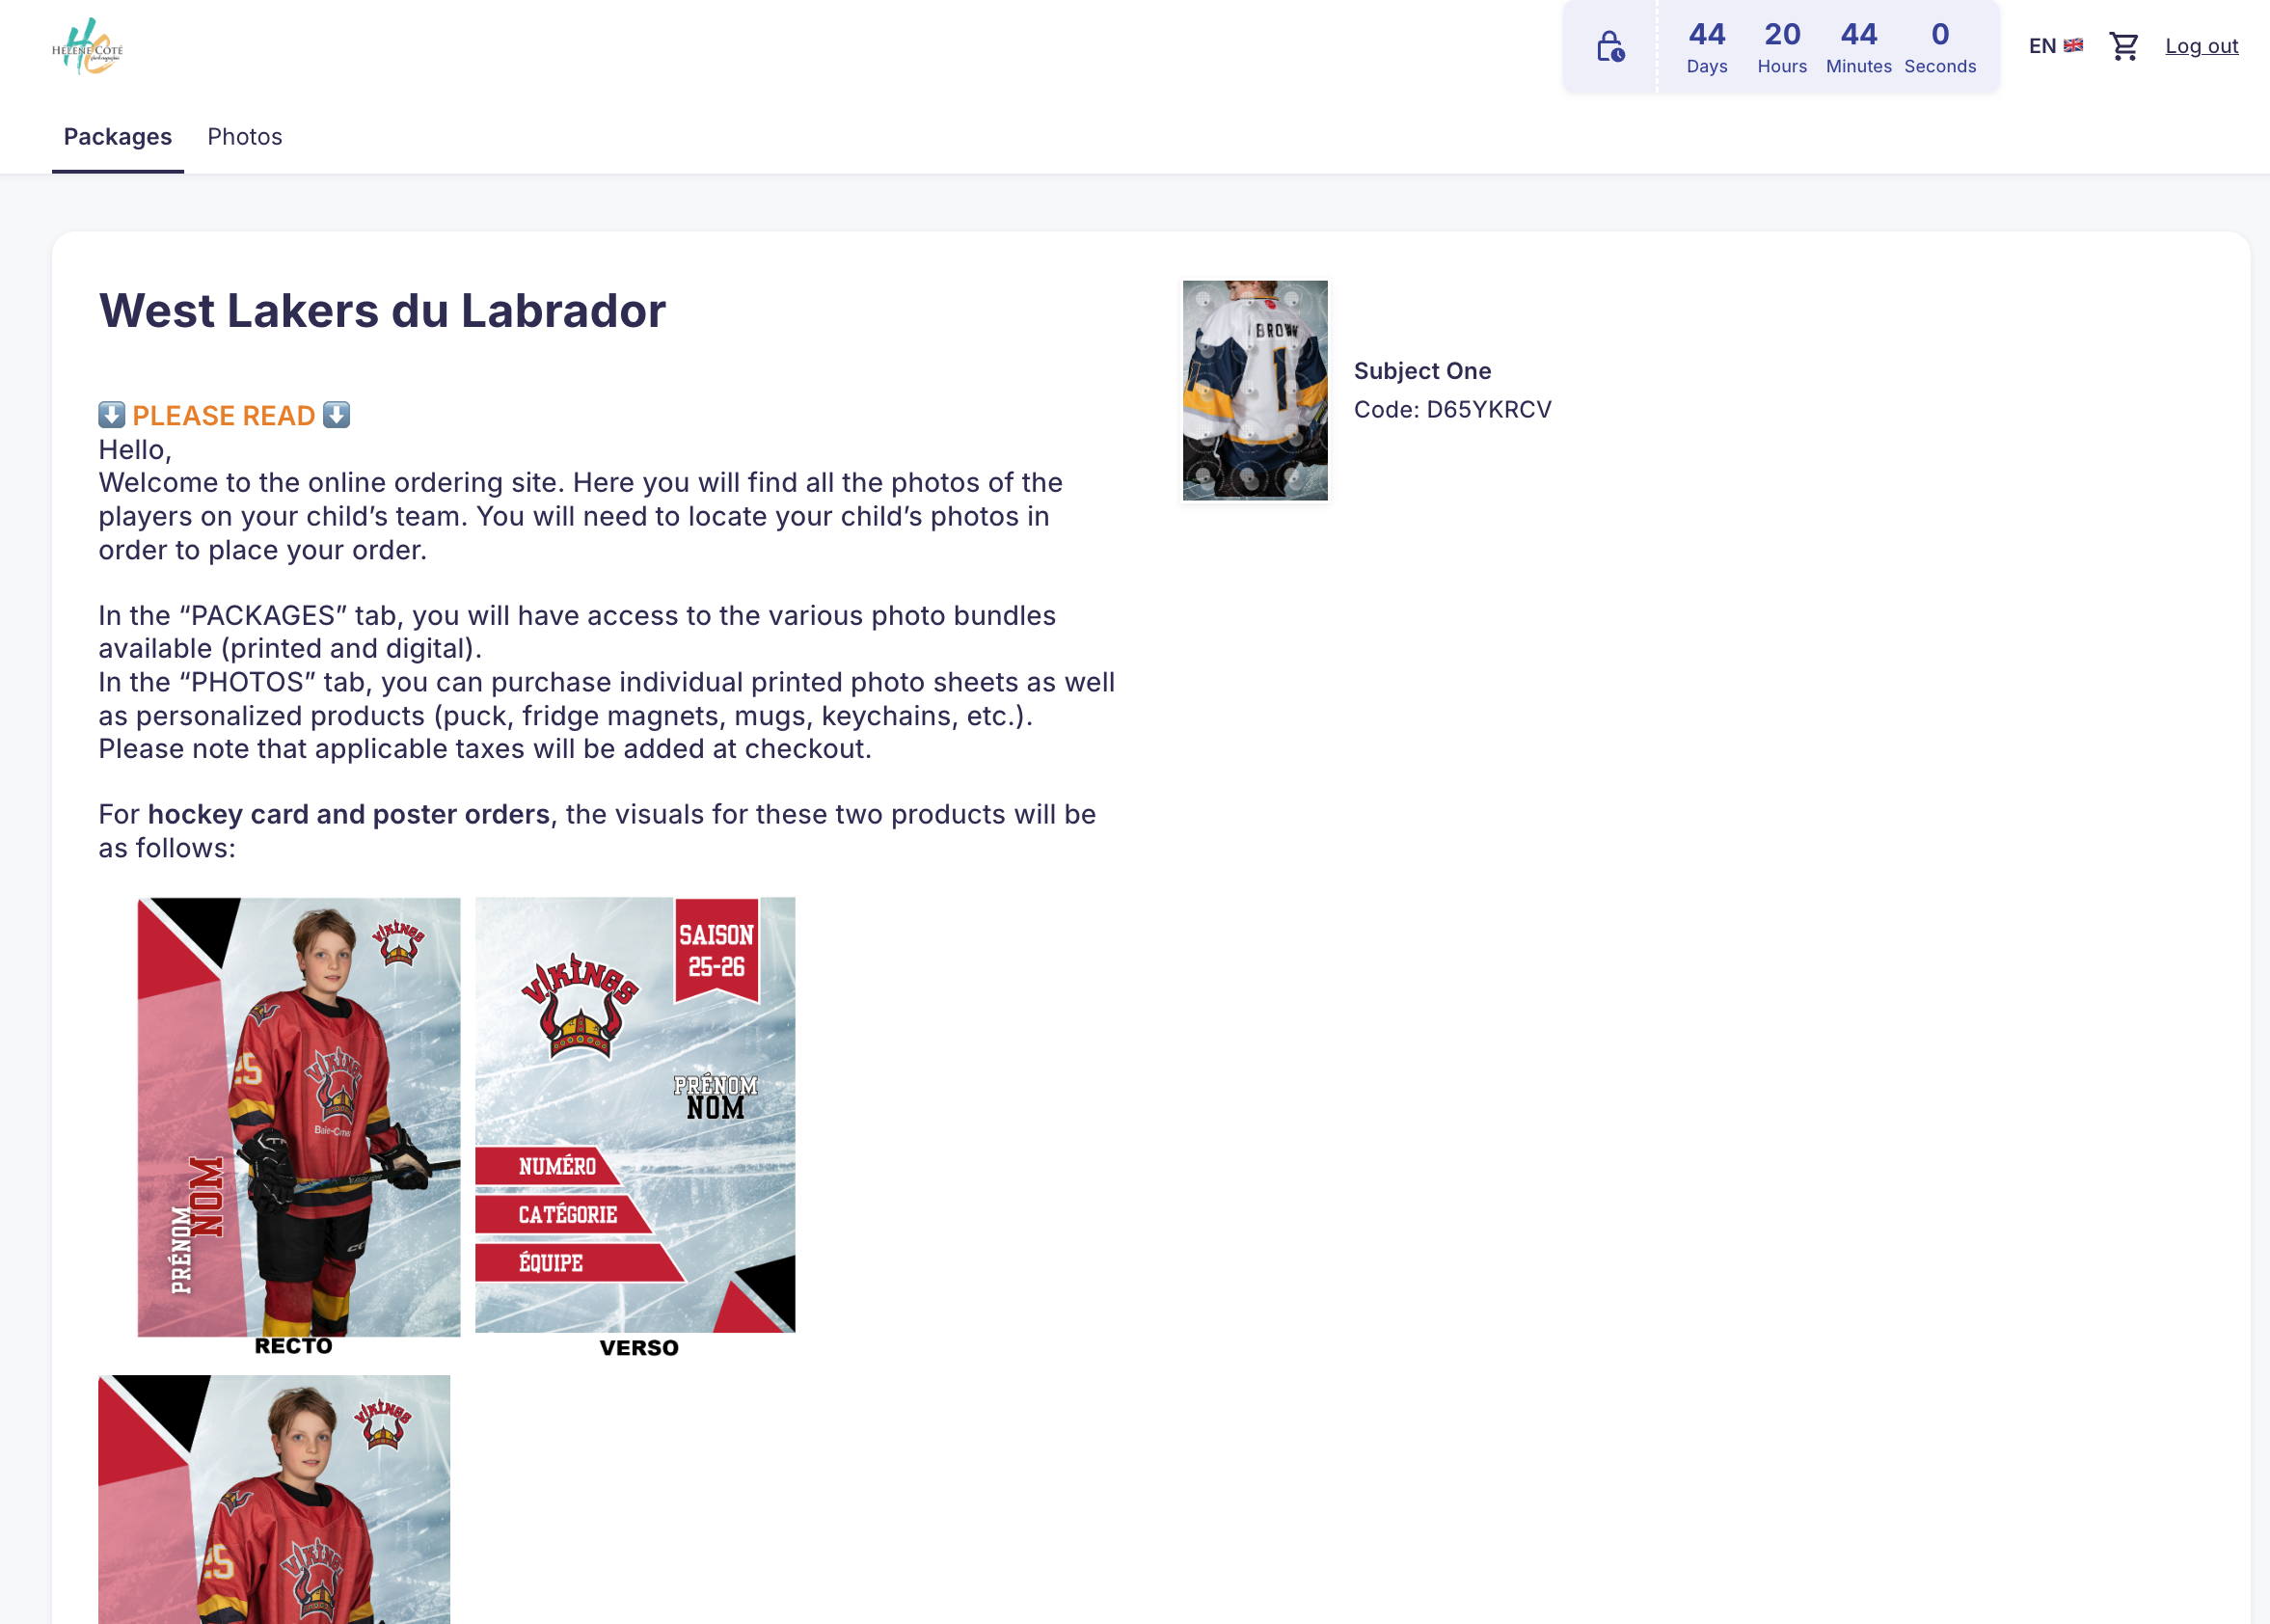
4- READ THE WELCOME MESSAGE
The welcome message is located at the top of the page and provides useful information about updates and the deadline for placing your order. After reading this message, scroll down or click on the “Packages” tab to view the available options and choose the one that best suits your needs.
If you entered more than one access code in Step 2, you will need to select which child you are choosing photos for.
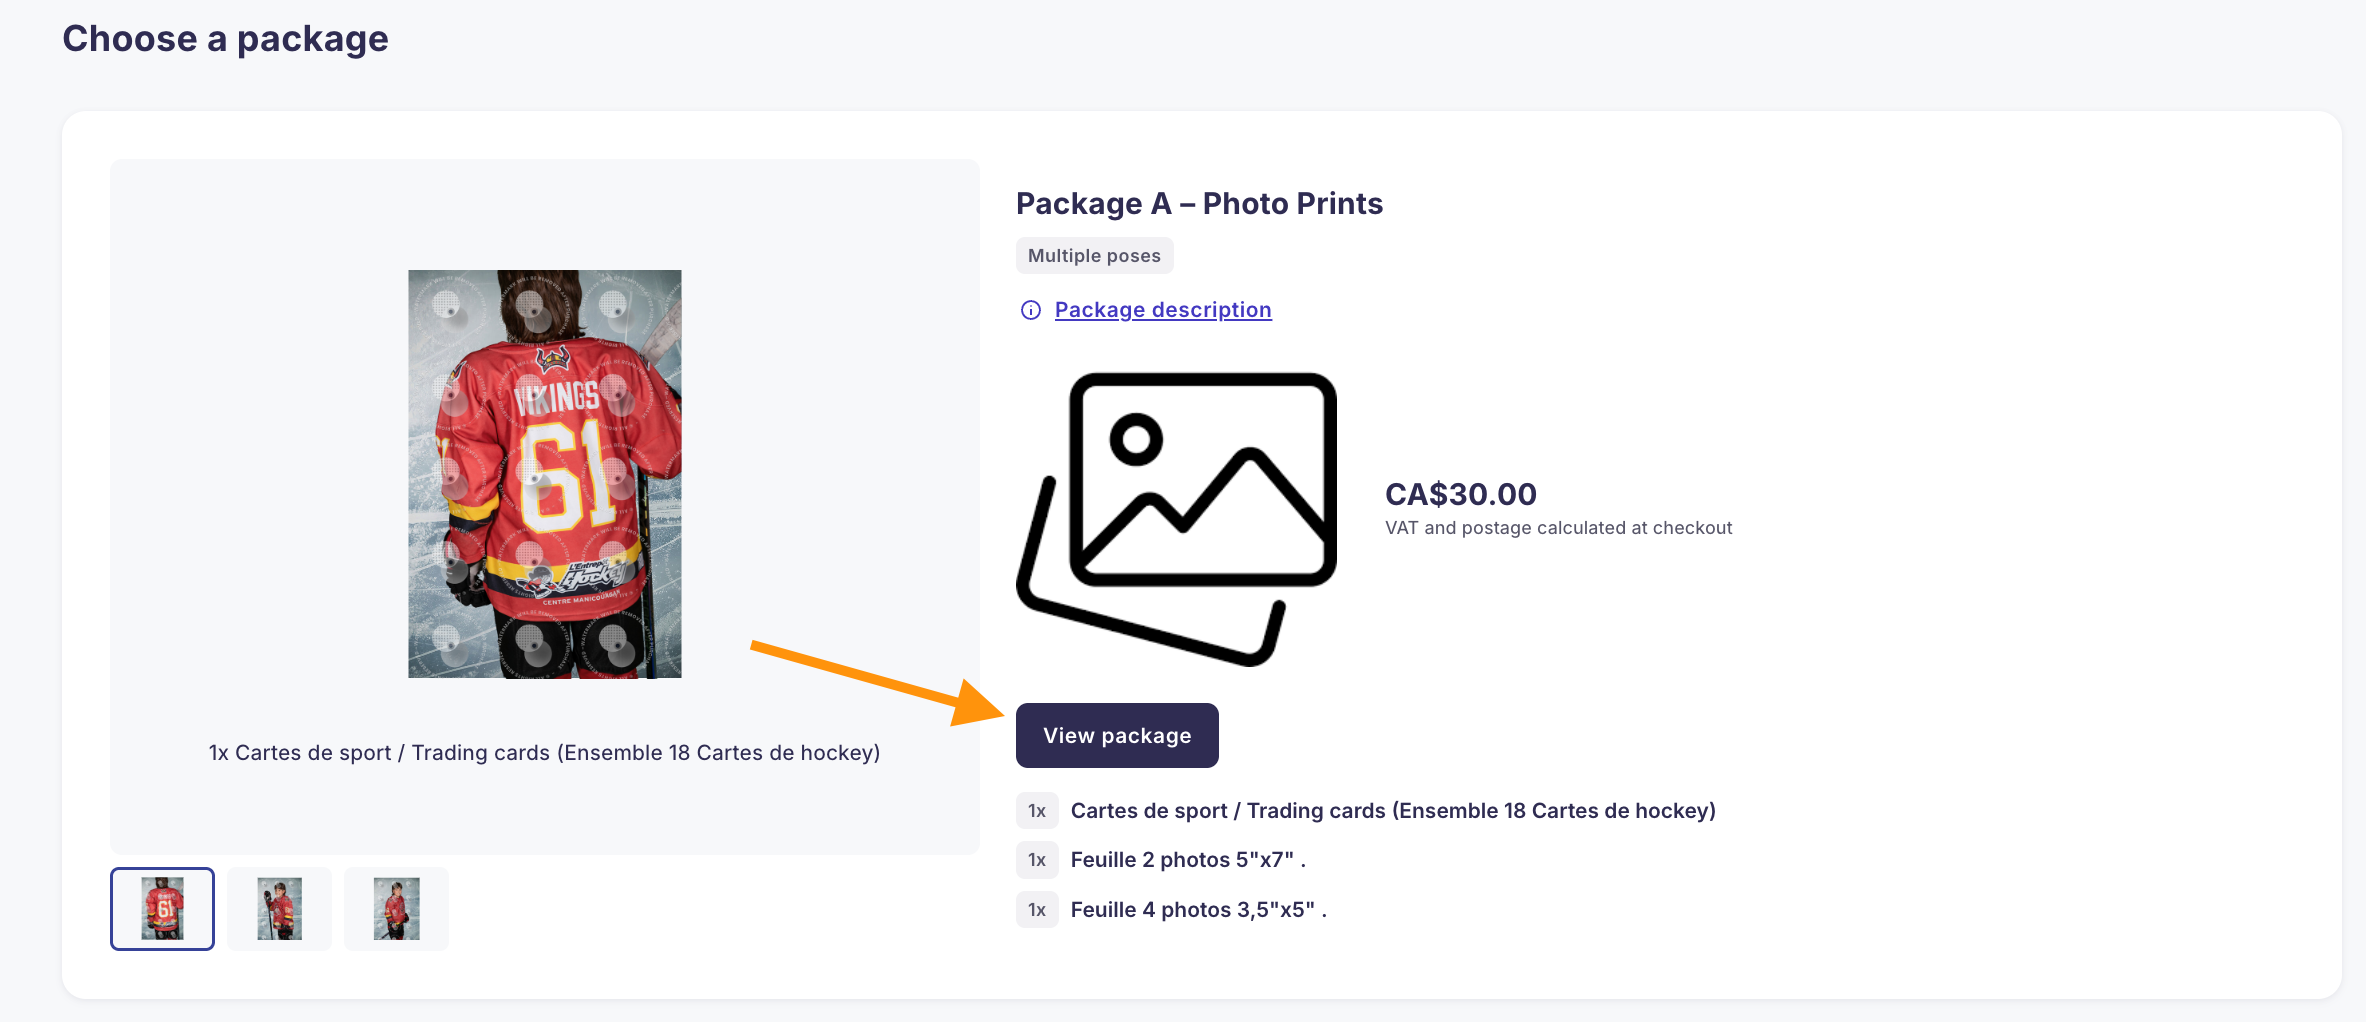
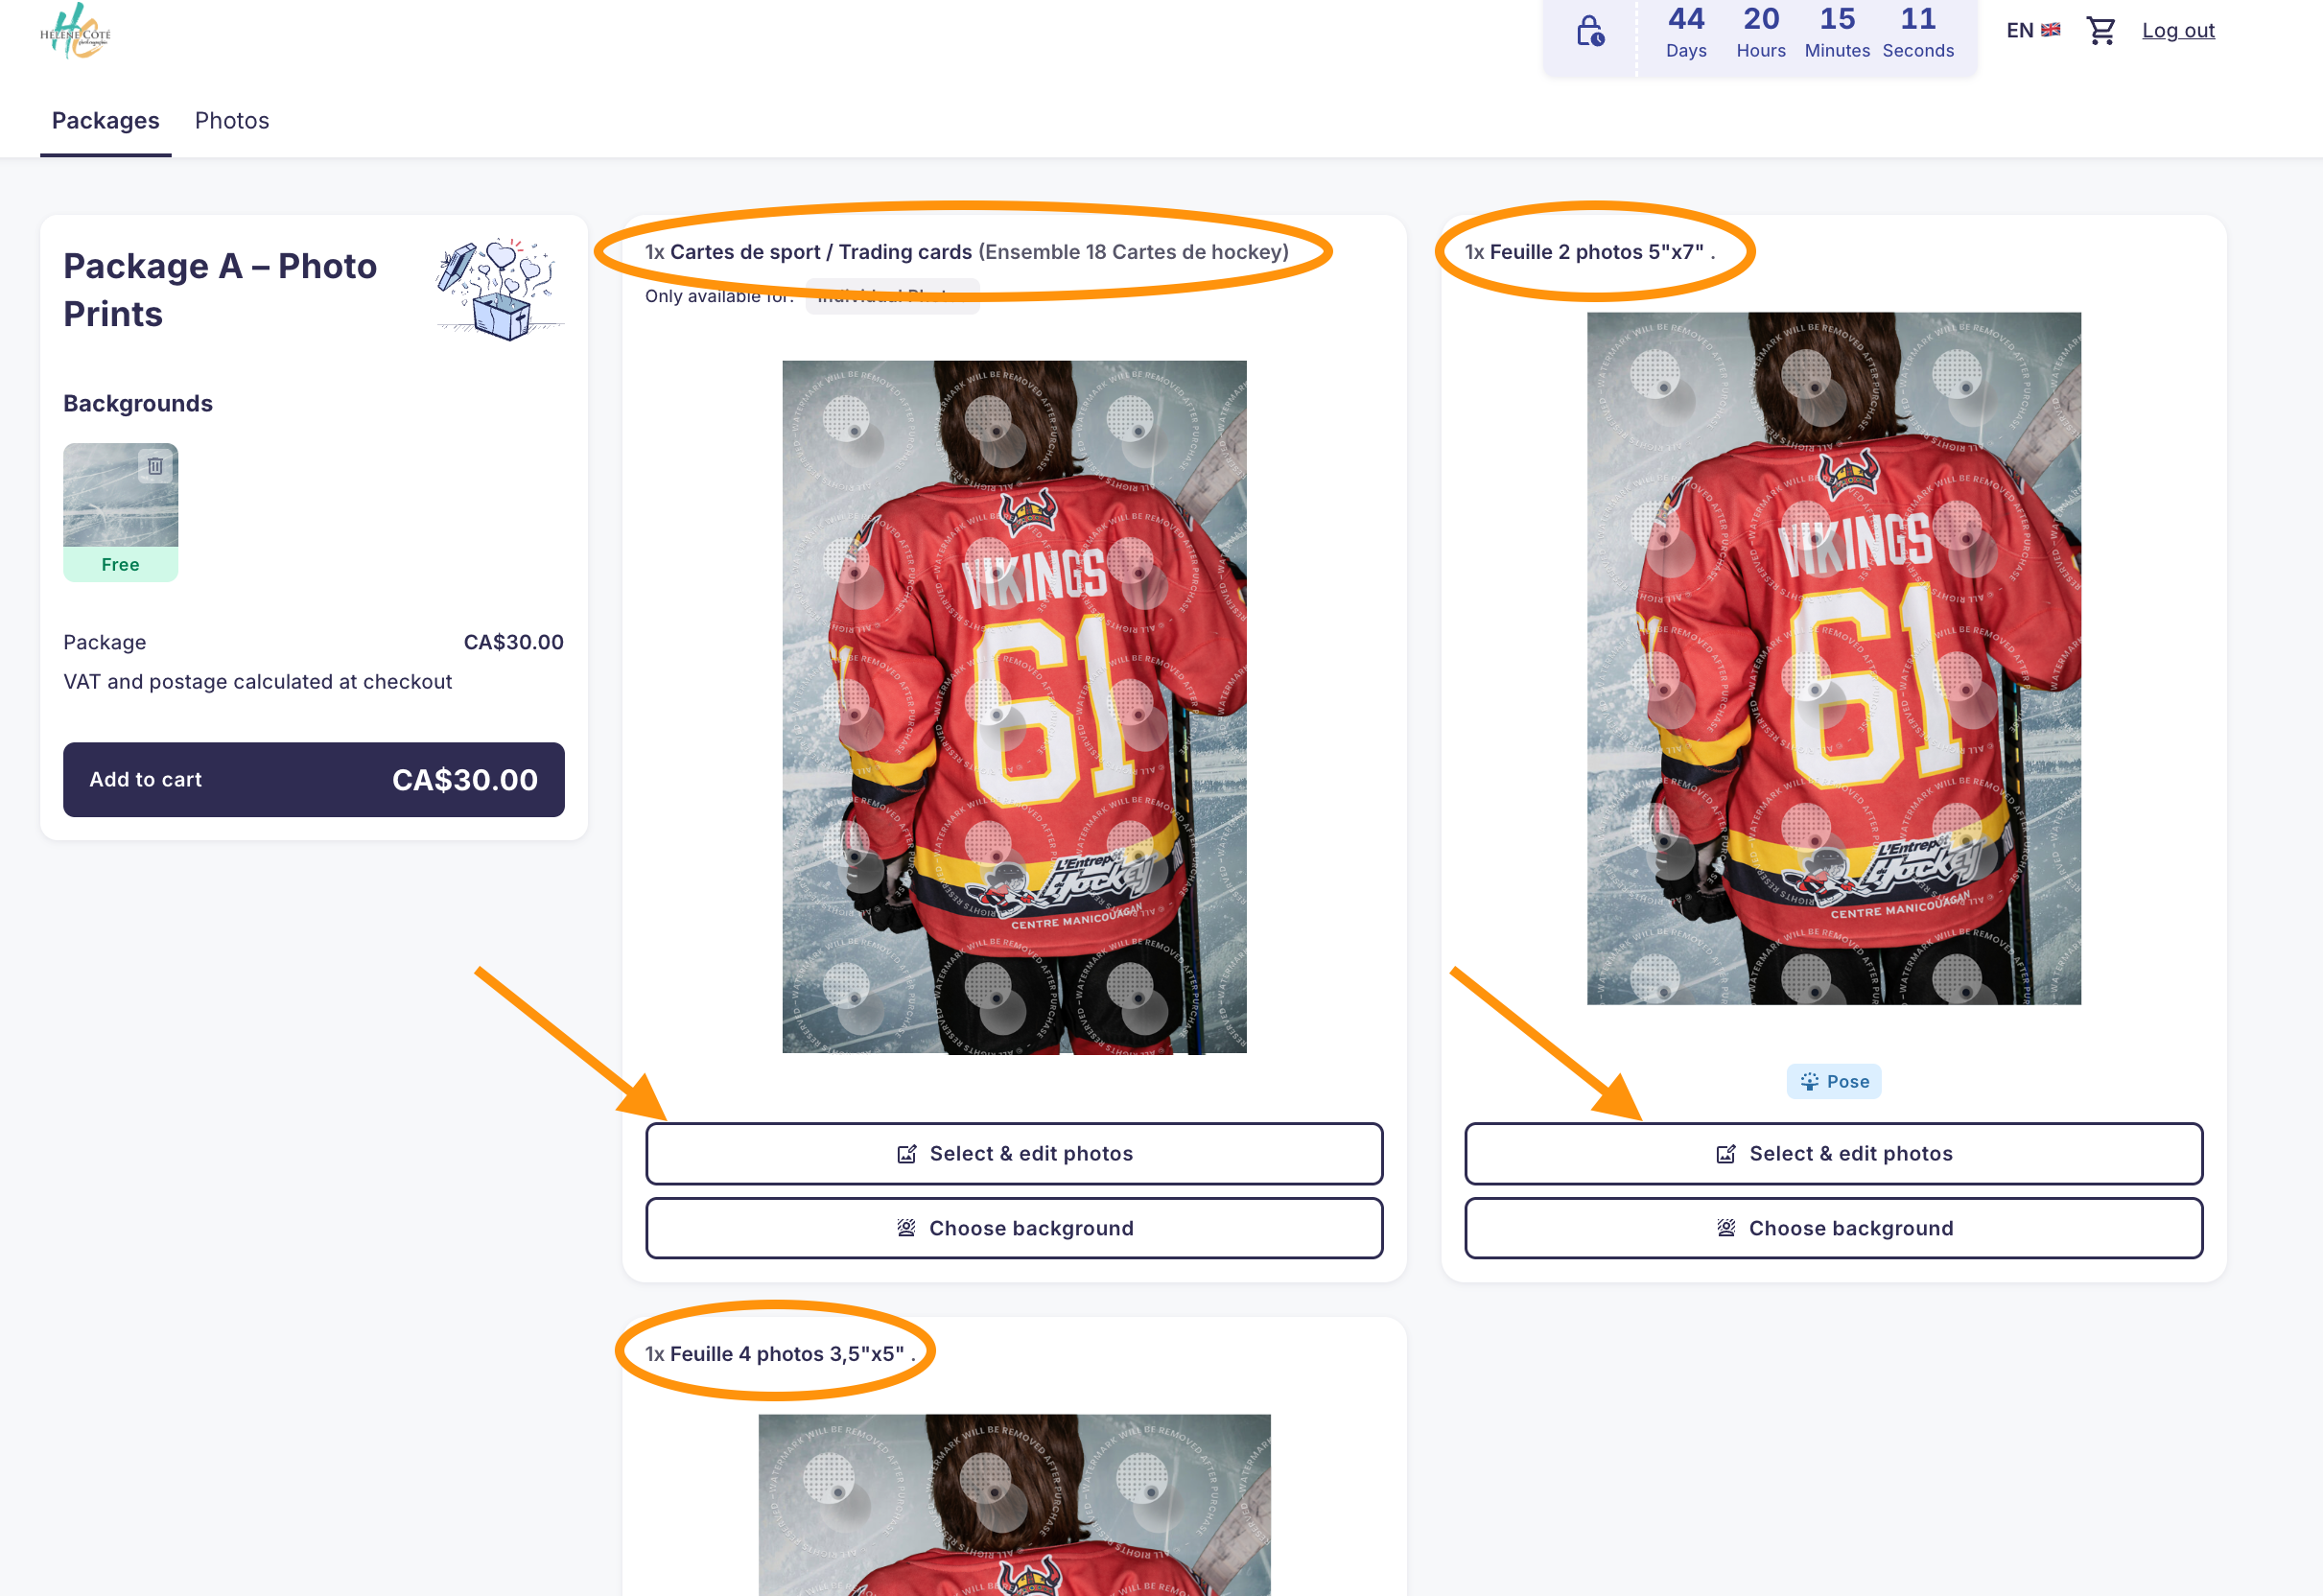
5- CHOOSE YOUR PHOTO PACKAGE
You are now in the “Packages” tab, where you can view all available photo packages. These packages include different combinations of printed photos.
This is also where you can purchase a package that includes the digital versions of the photos.
If one of the packages suits your needs, click the “View Package” button.
6- Customize Your Photo Package
After clicking on the package of your choice, you will be taken to the page where you can customize the photos included in your package. At this stage, you will see a preview of your photo set.
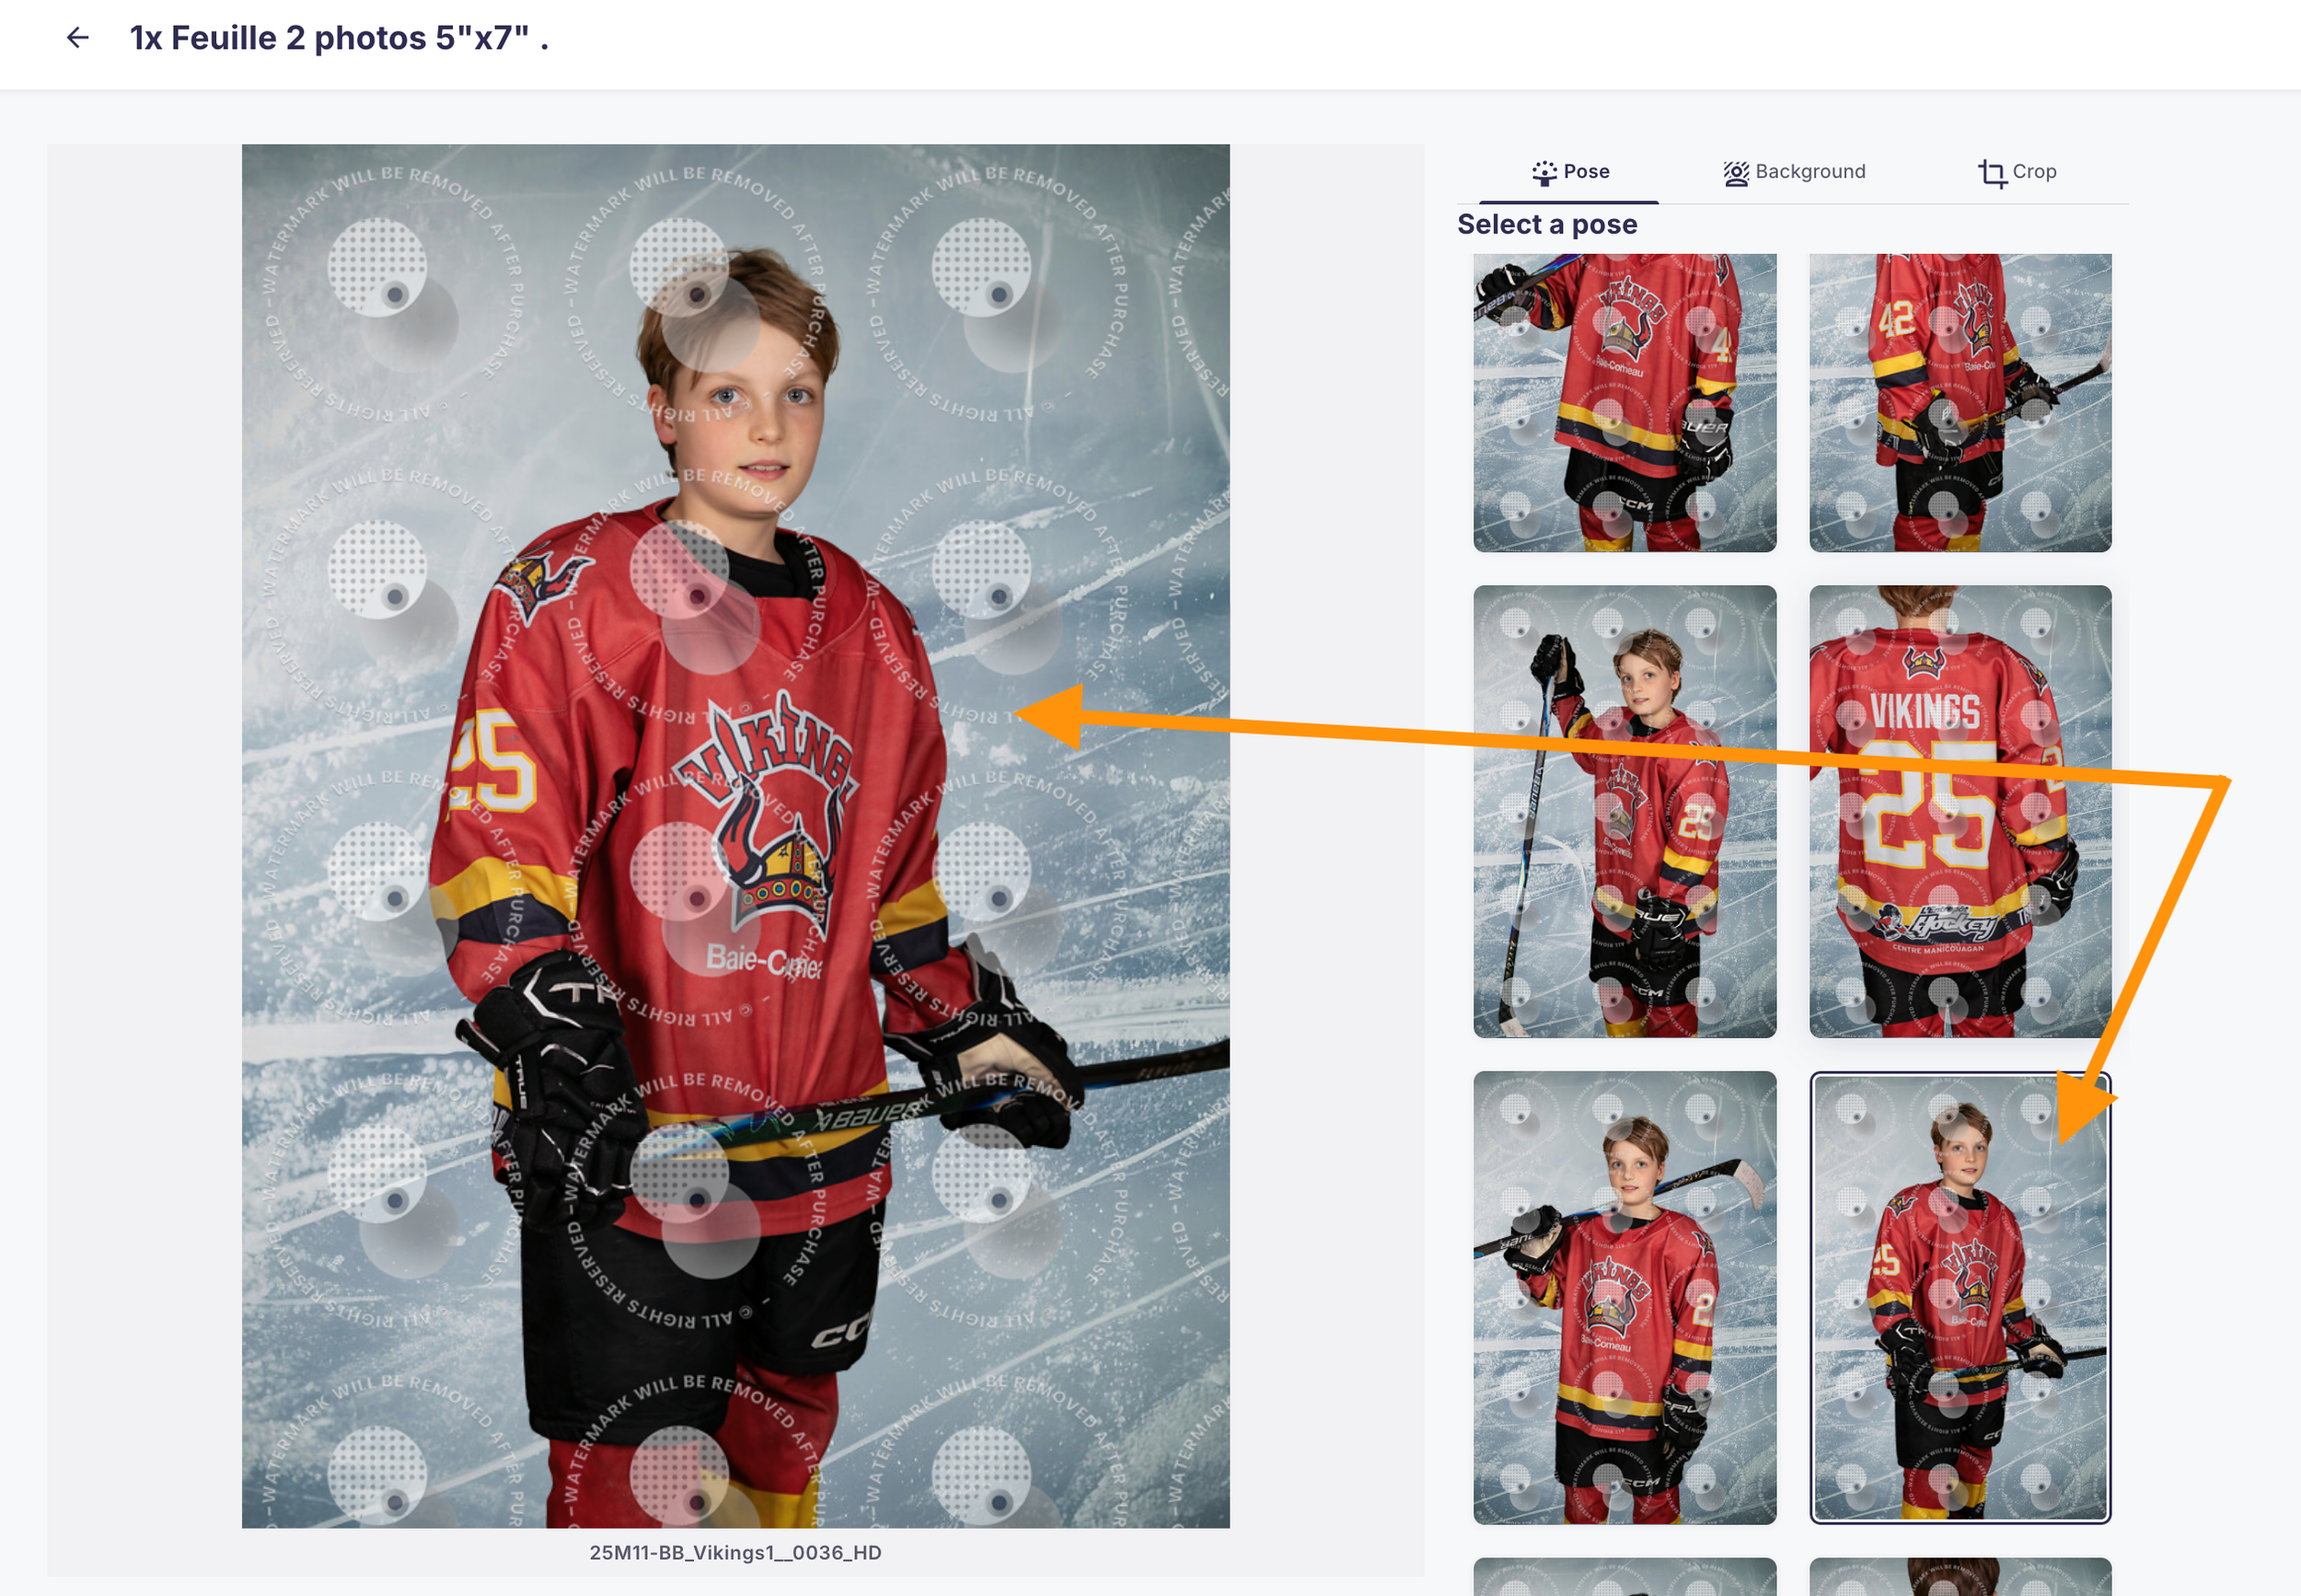
A) Click the “Select & Edit Photos” button under each product to choose the pose you want for that specific print.
Please note that print sizes are shown in inches.
B) Click on the photo you would like to use for the selected print size.
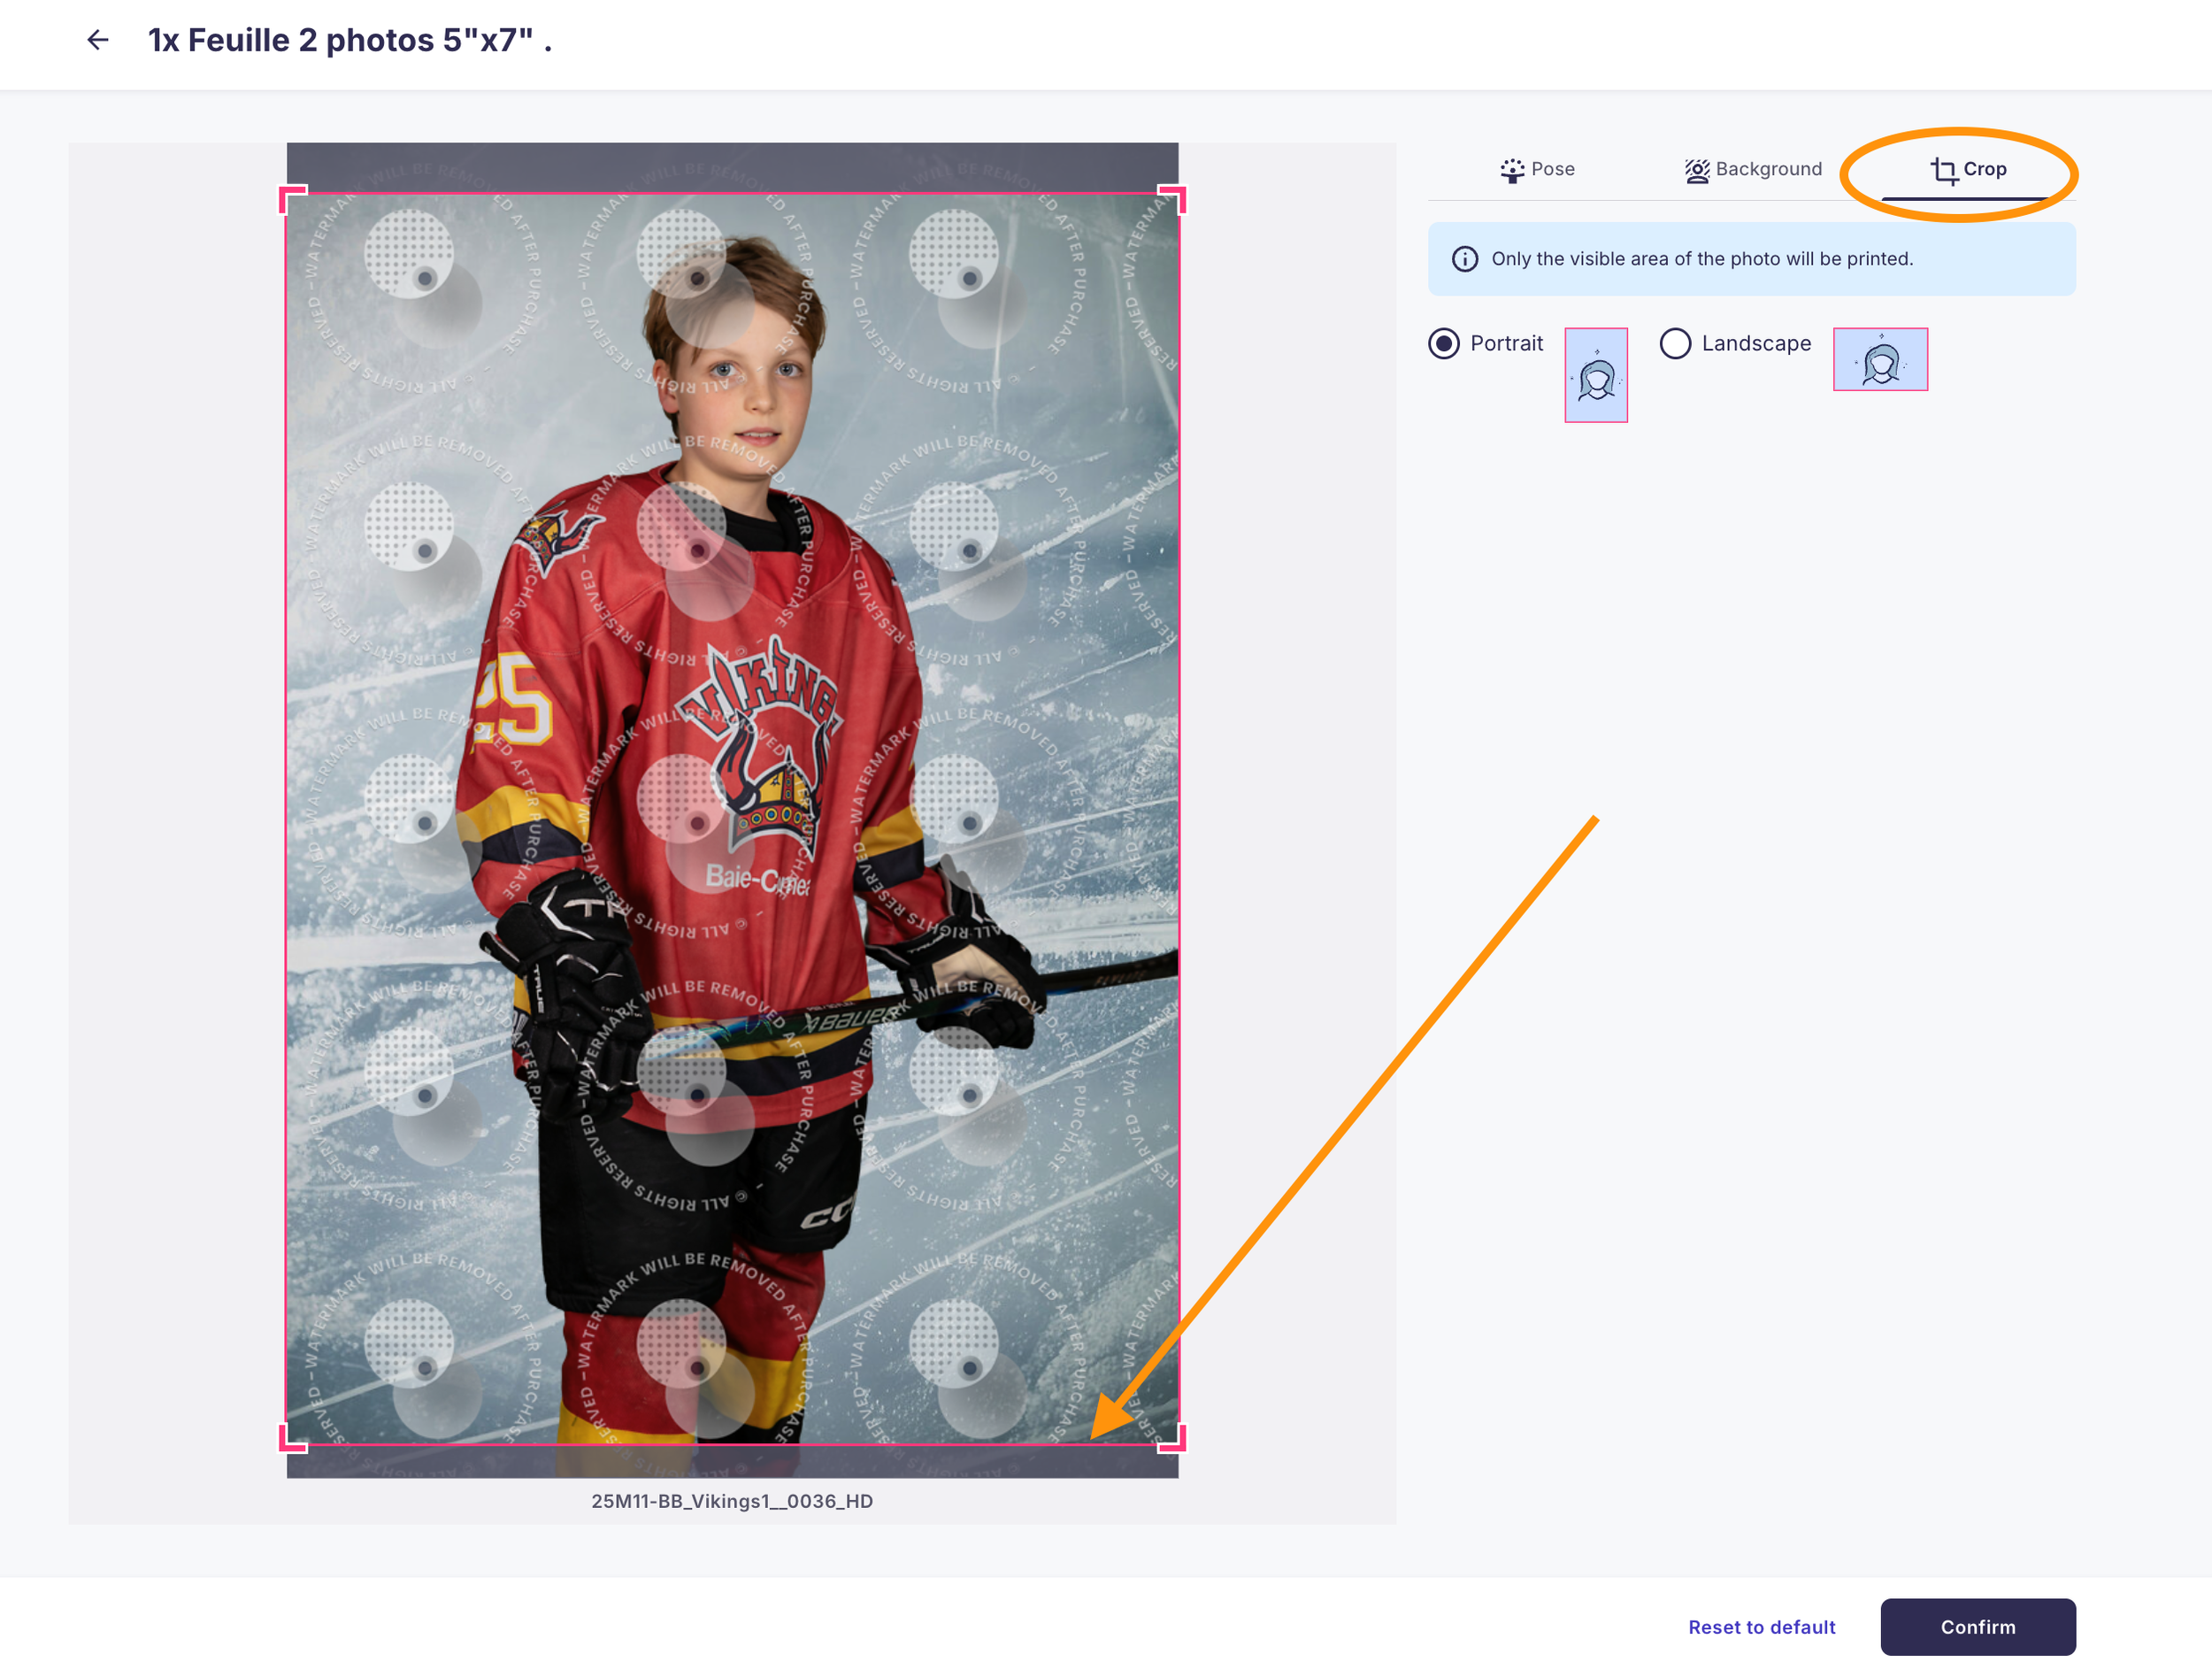
C) Click the “Crop” tab to adjust the framing. The red box represents the portion of the image that will be printed. You can move the red box to cover the part of the image you want to appear in the final print.
Once you have selected your photo and adjusted the crop, click “Confirm”.
Repeat steps A–B–C for each product included in the package.
When finished, click “Add to Cart”.
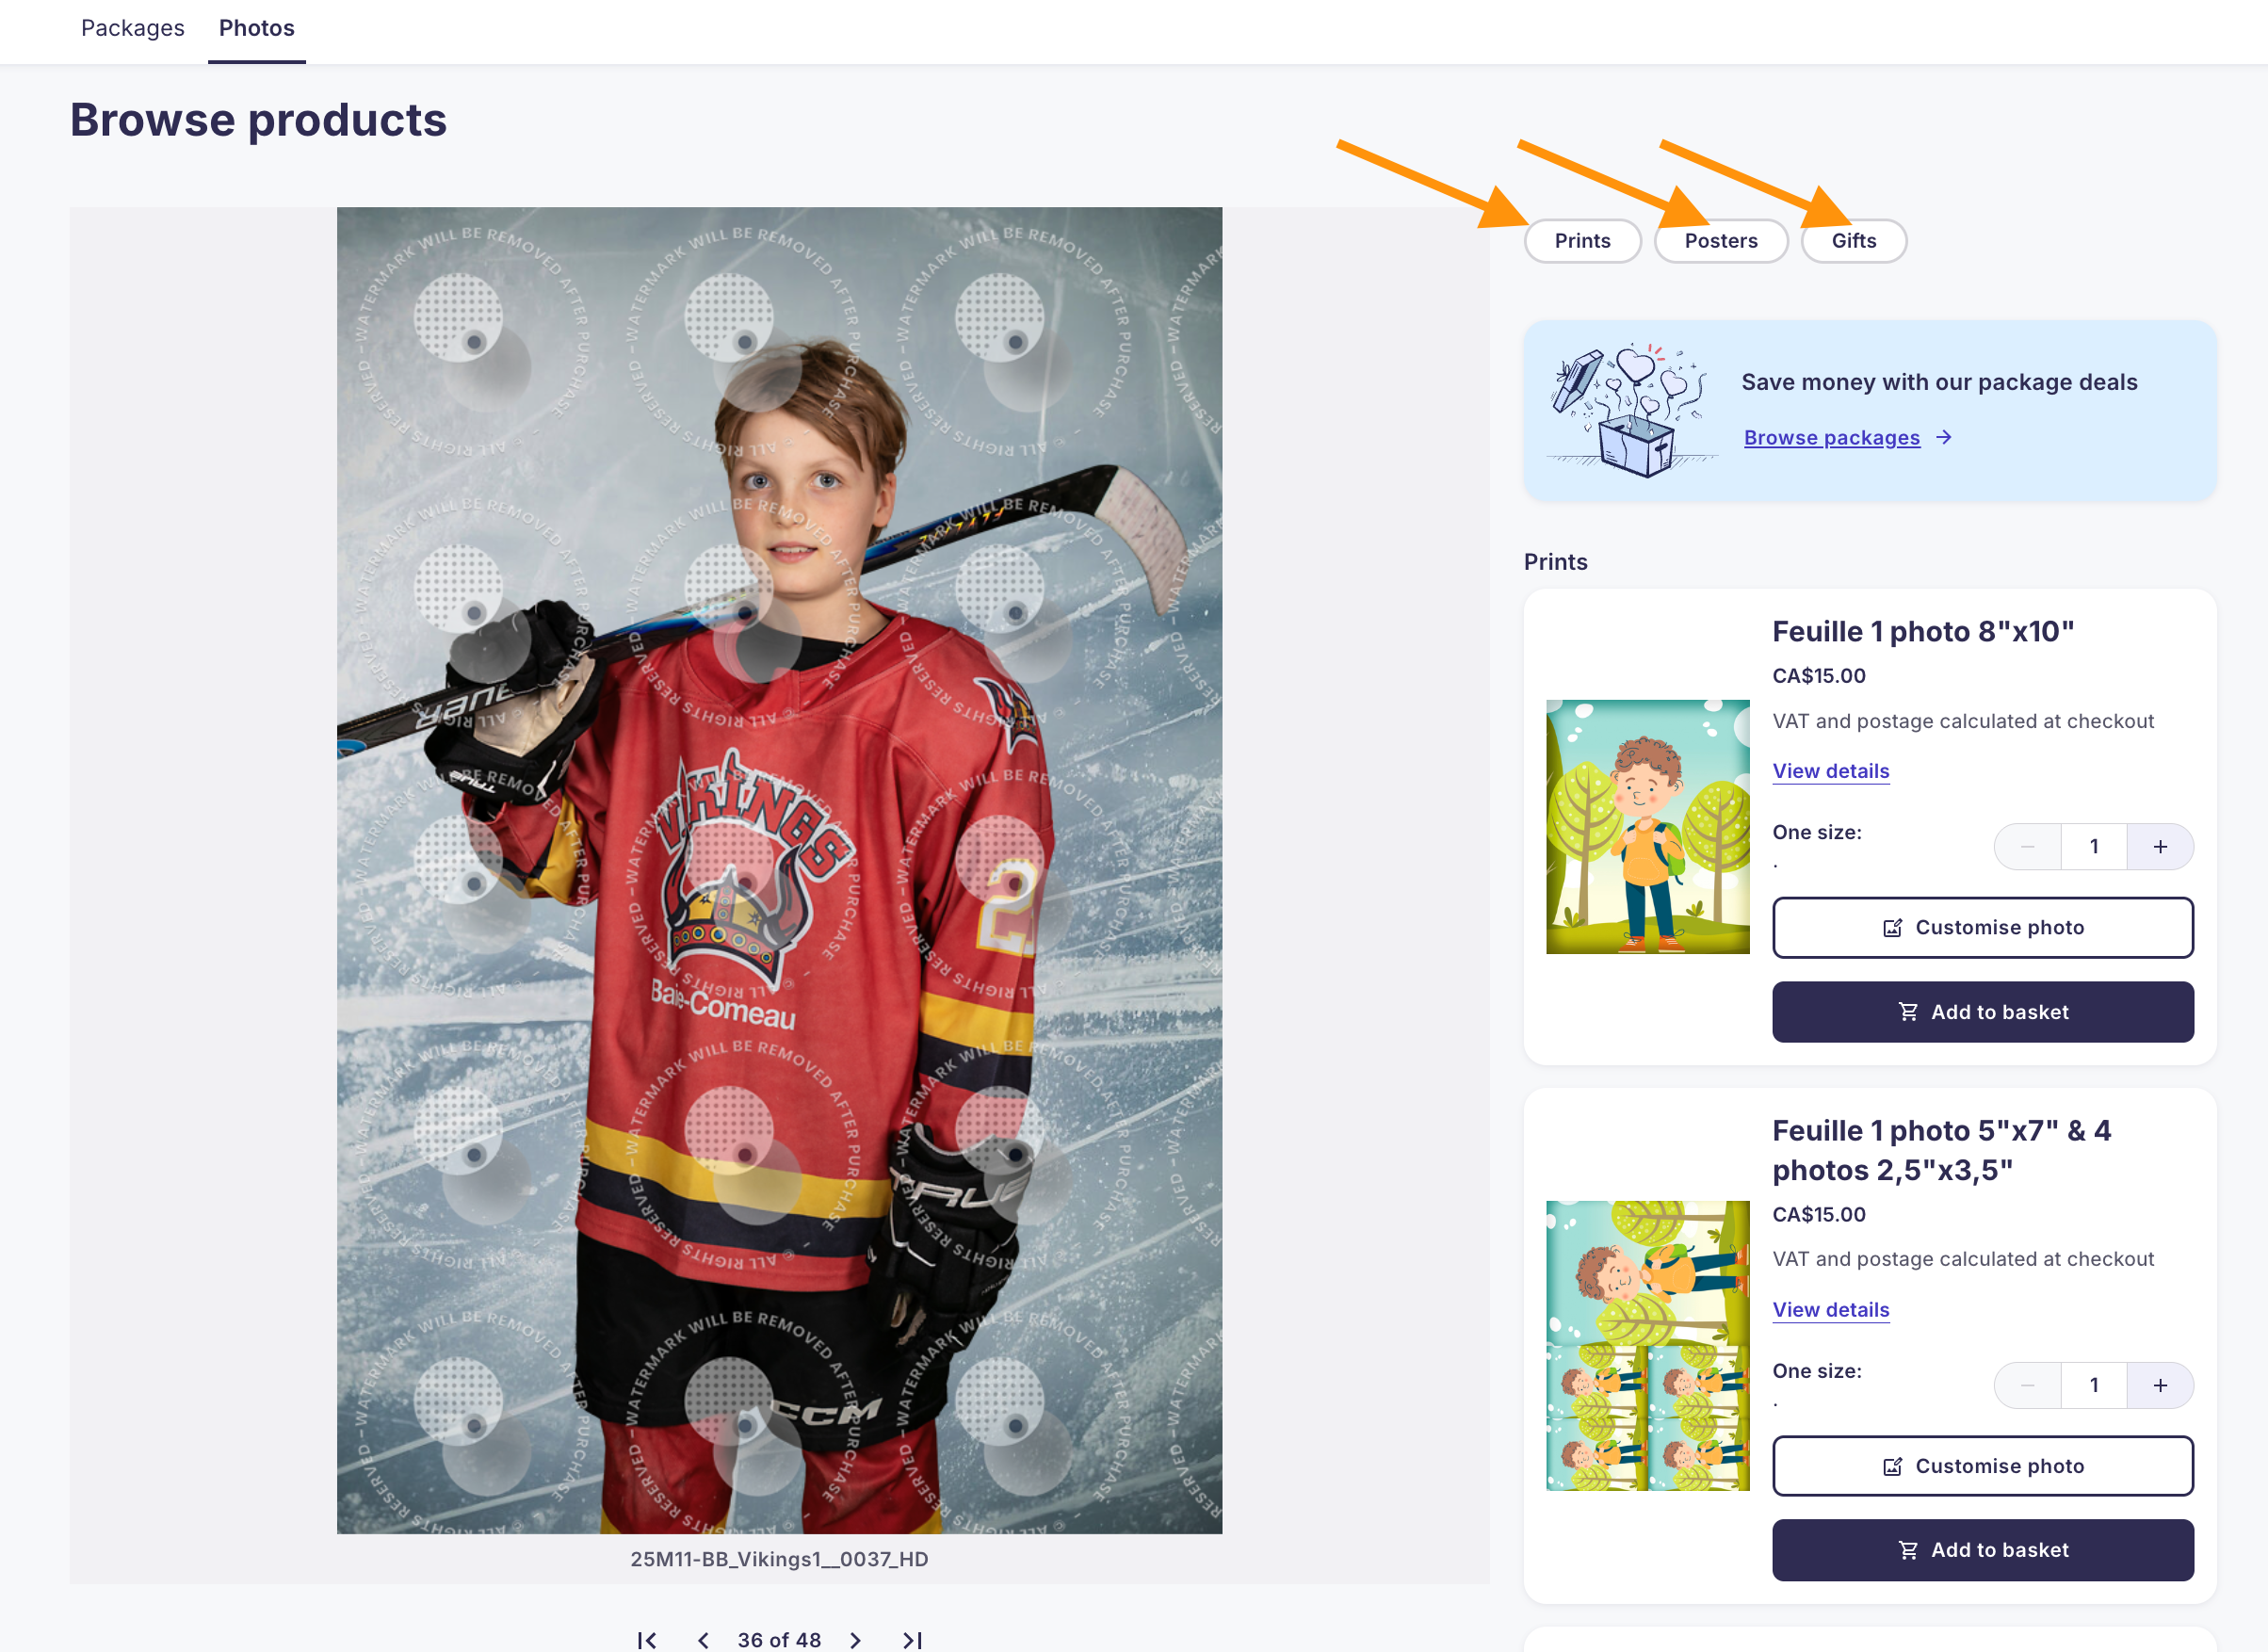
7- Personalized Products
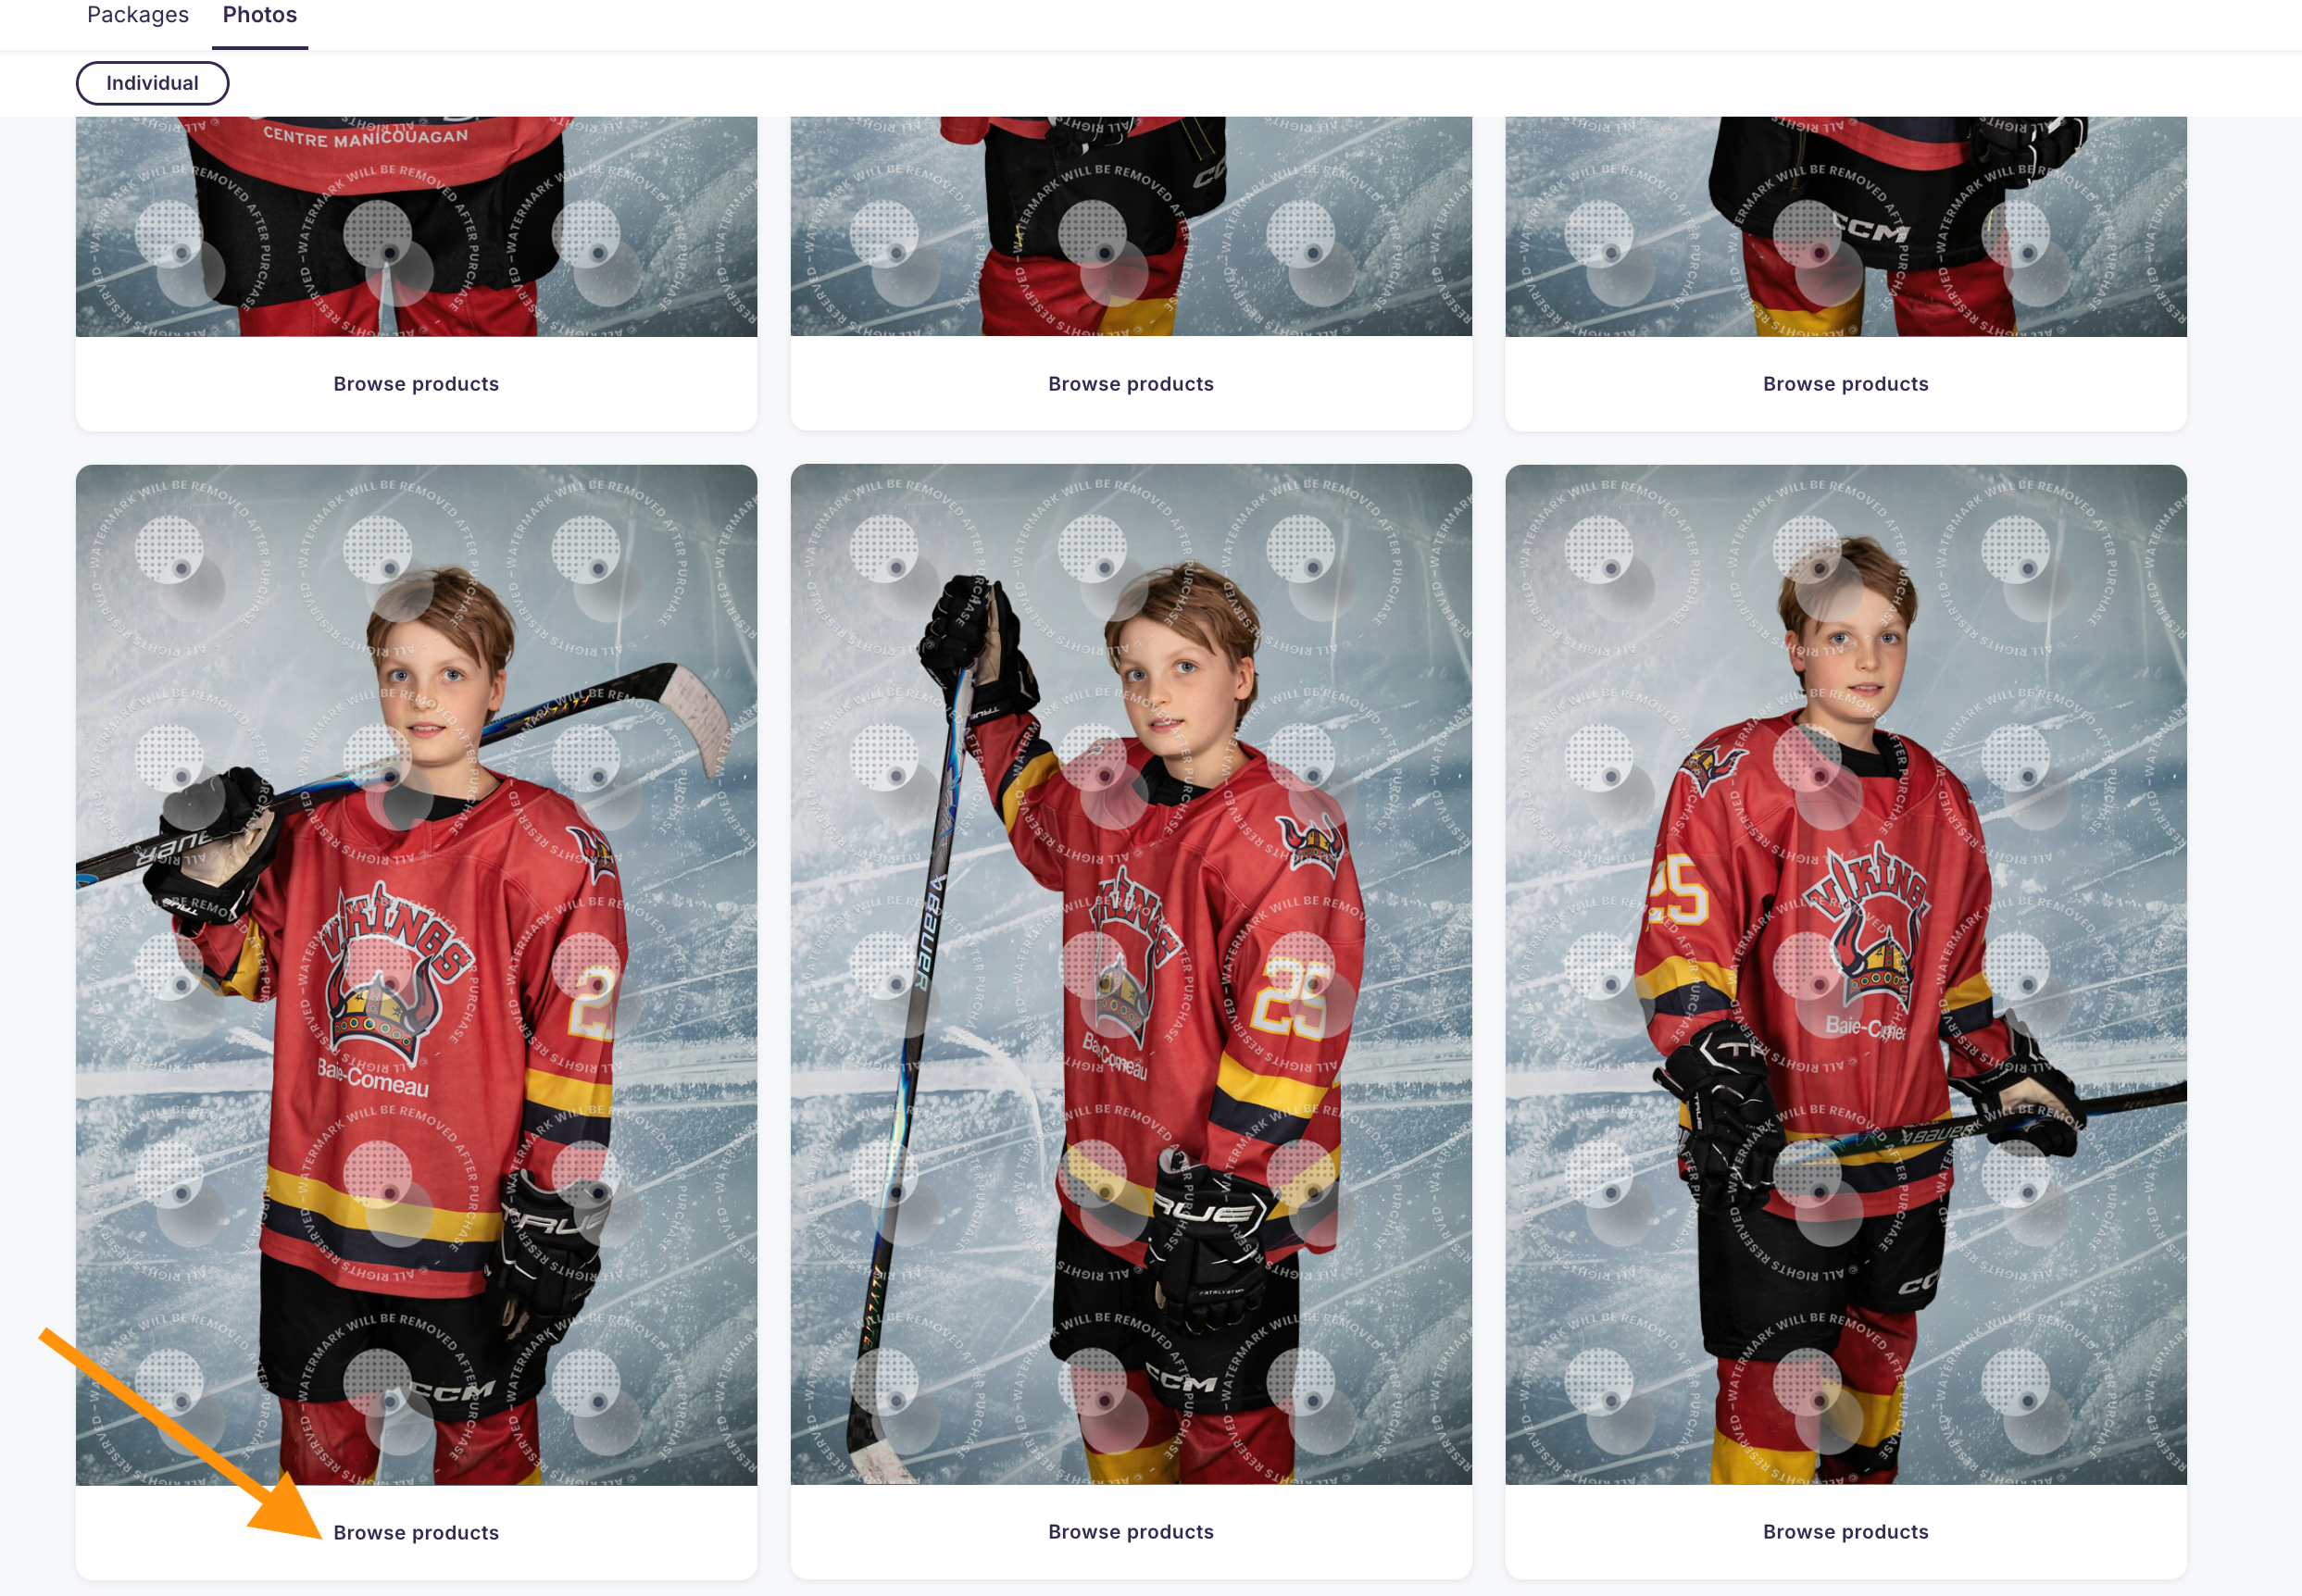
Personalized photo items such as mugs, hockey puck, magnet photos, keychains and many others are available. To access these products, click on the “Photos” tab at the top of the page.
If you do not wish to order personalized products, proceed to Step 10.

8- Choose Your Image for a Personalized Product
To view the available products, click the “Browse Products” button under the photo you want to use for a personalized item.
9- Select the Personalized Product
On the right side, you will see the list of all available products. Click on the product of your choice to select the size (if applicable) and the quantity.
When you’re ready, click the “Add to Cart” button.
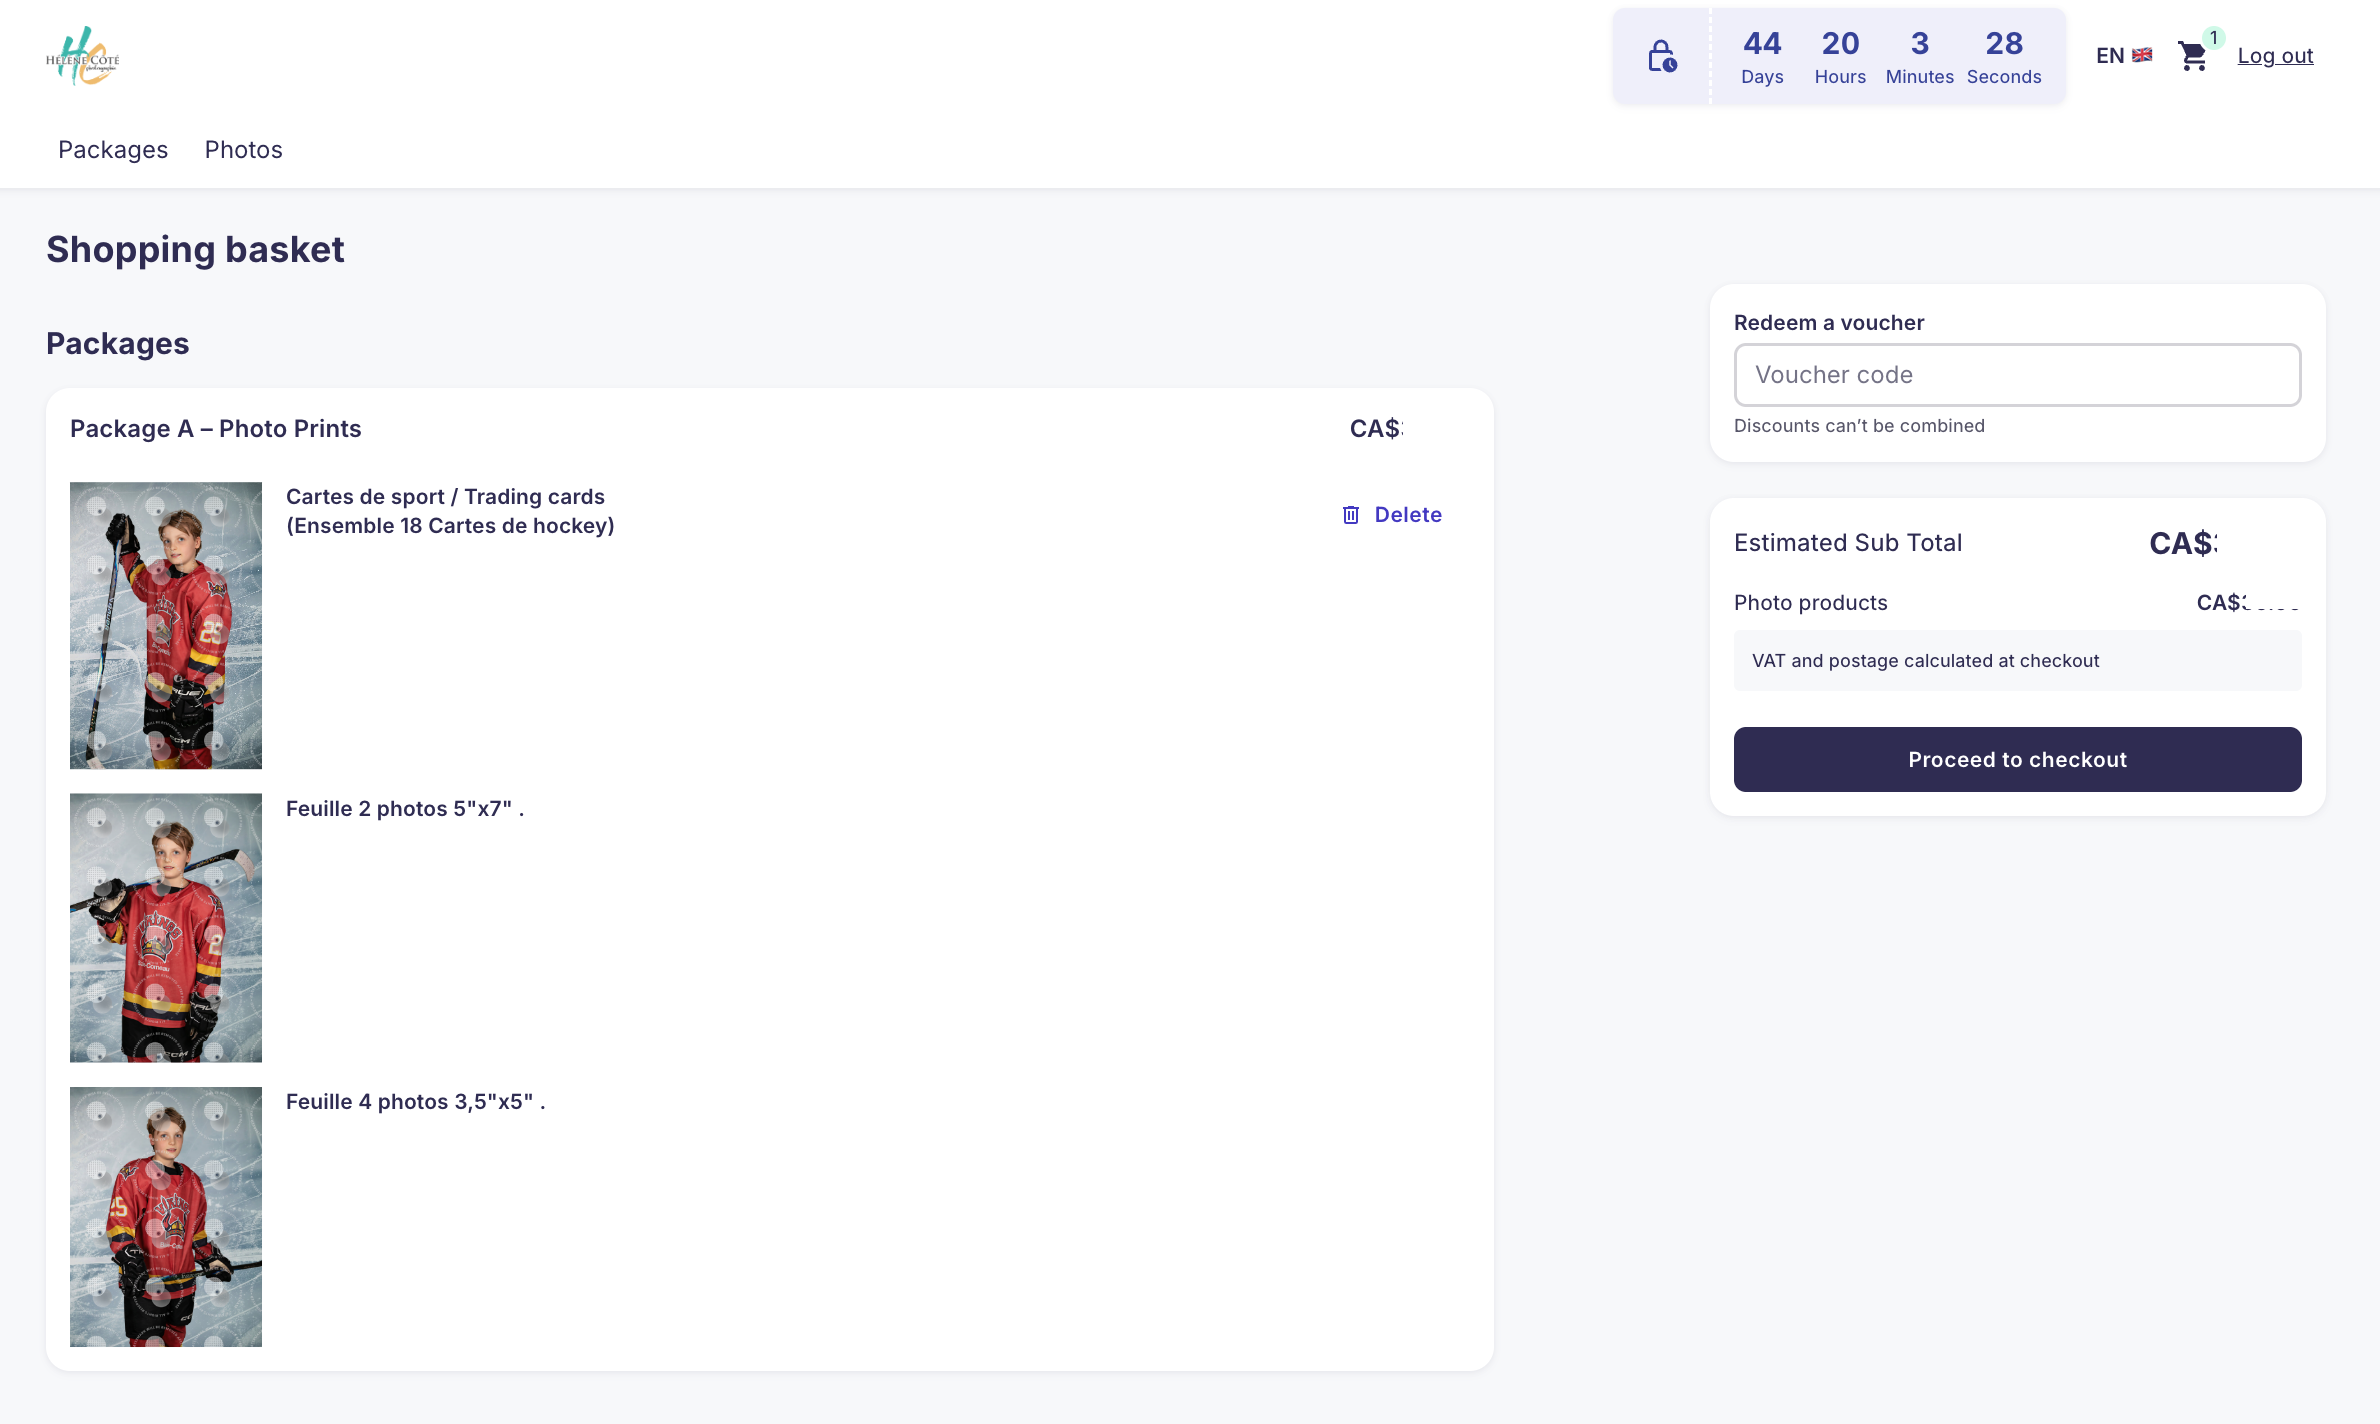
10- View Your Cart
To view your cart, click the “Cart” button located at the top right of the page.

11- Cart Details
Once you are in your cart, you will see the details of your order:
The list of products you selected
The cost of the products
Shipping fees (if applicable)
When you’re ready, click “Proceed to Checkout.”
12- Personal Information
You will then be asked to enter your personal information.
Once this is done, click “Next Step.”

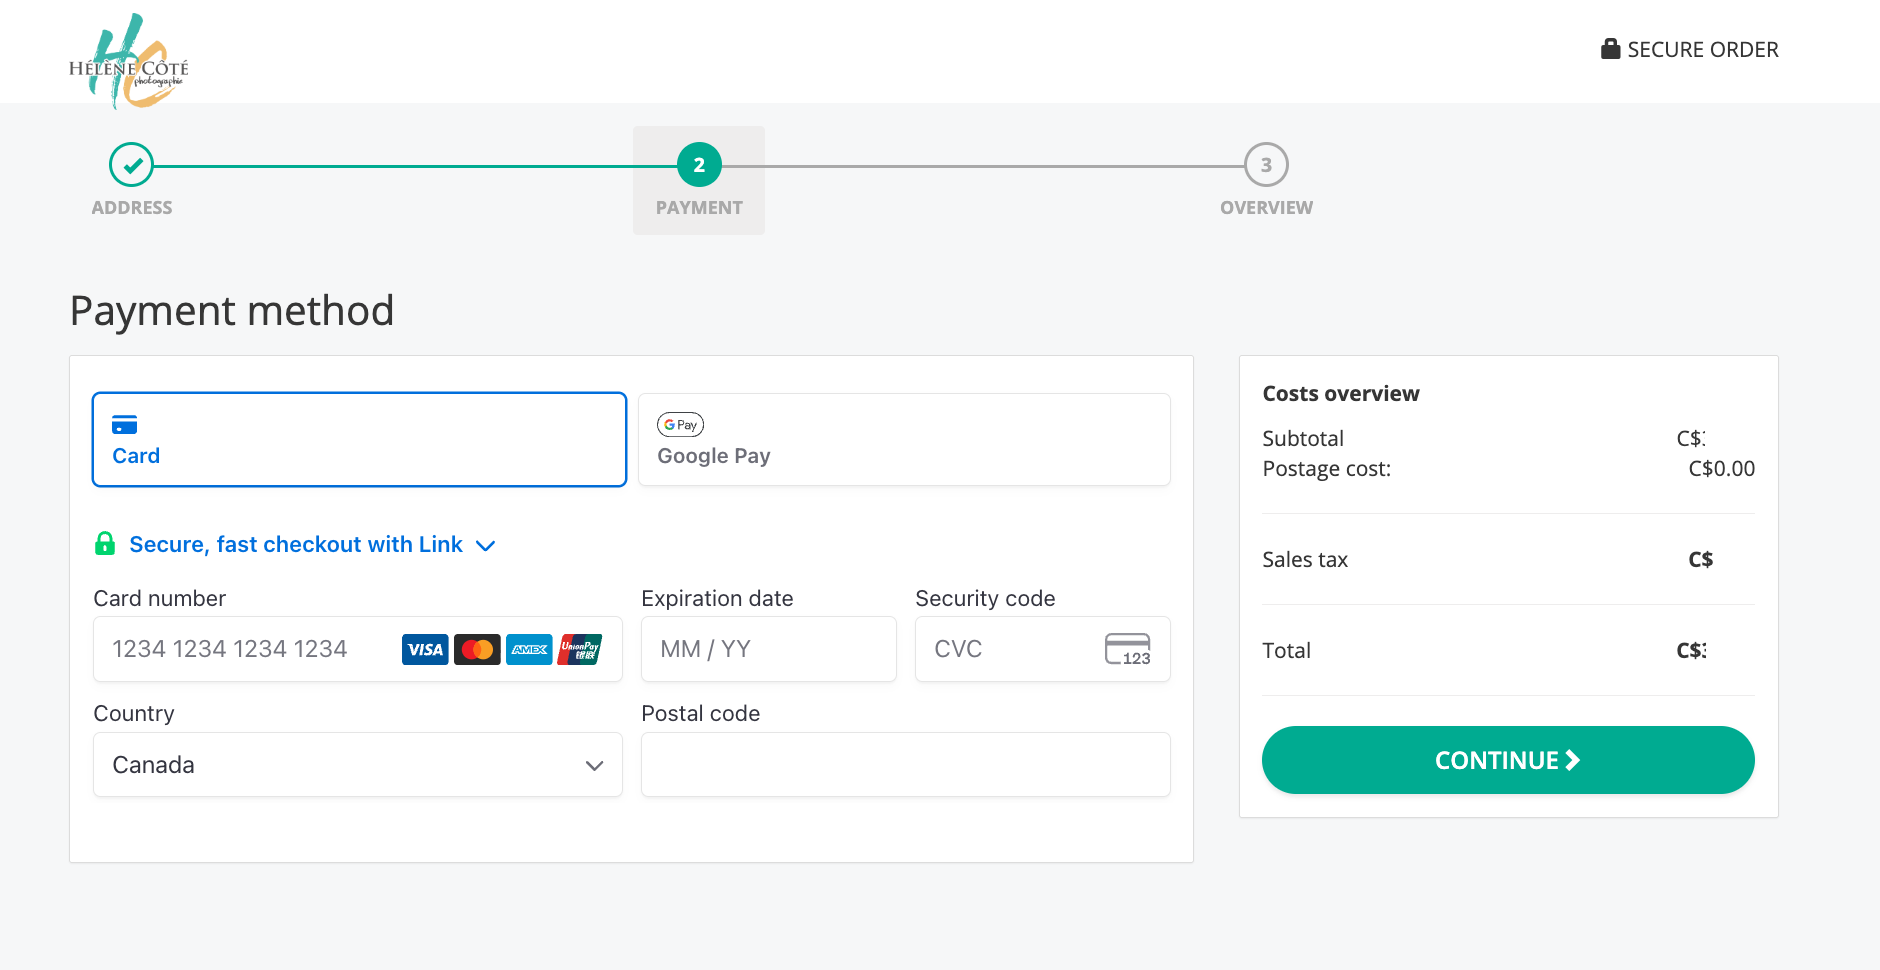
13- Payment Method
You will then be asked to enter your credit card information.
Once this is done, click “Continue.”
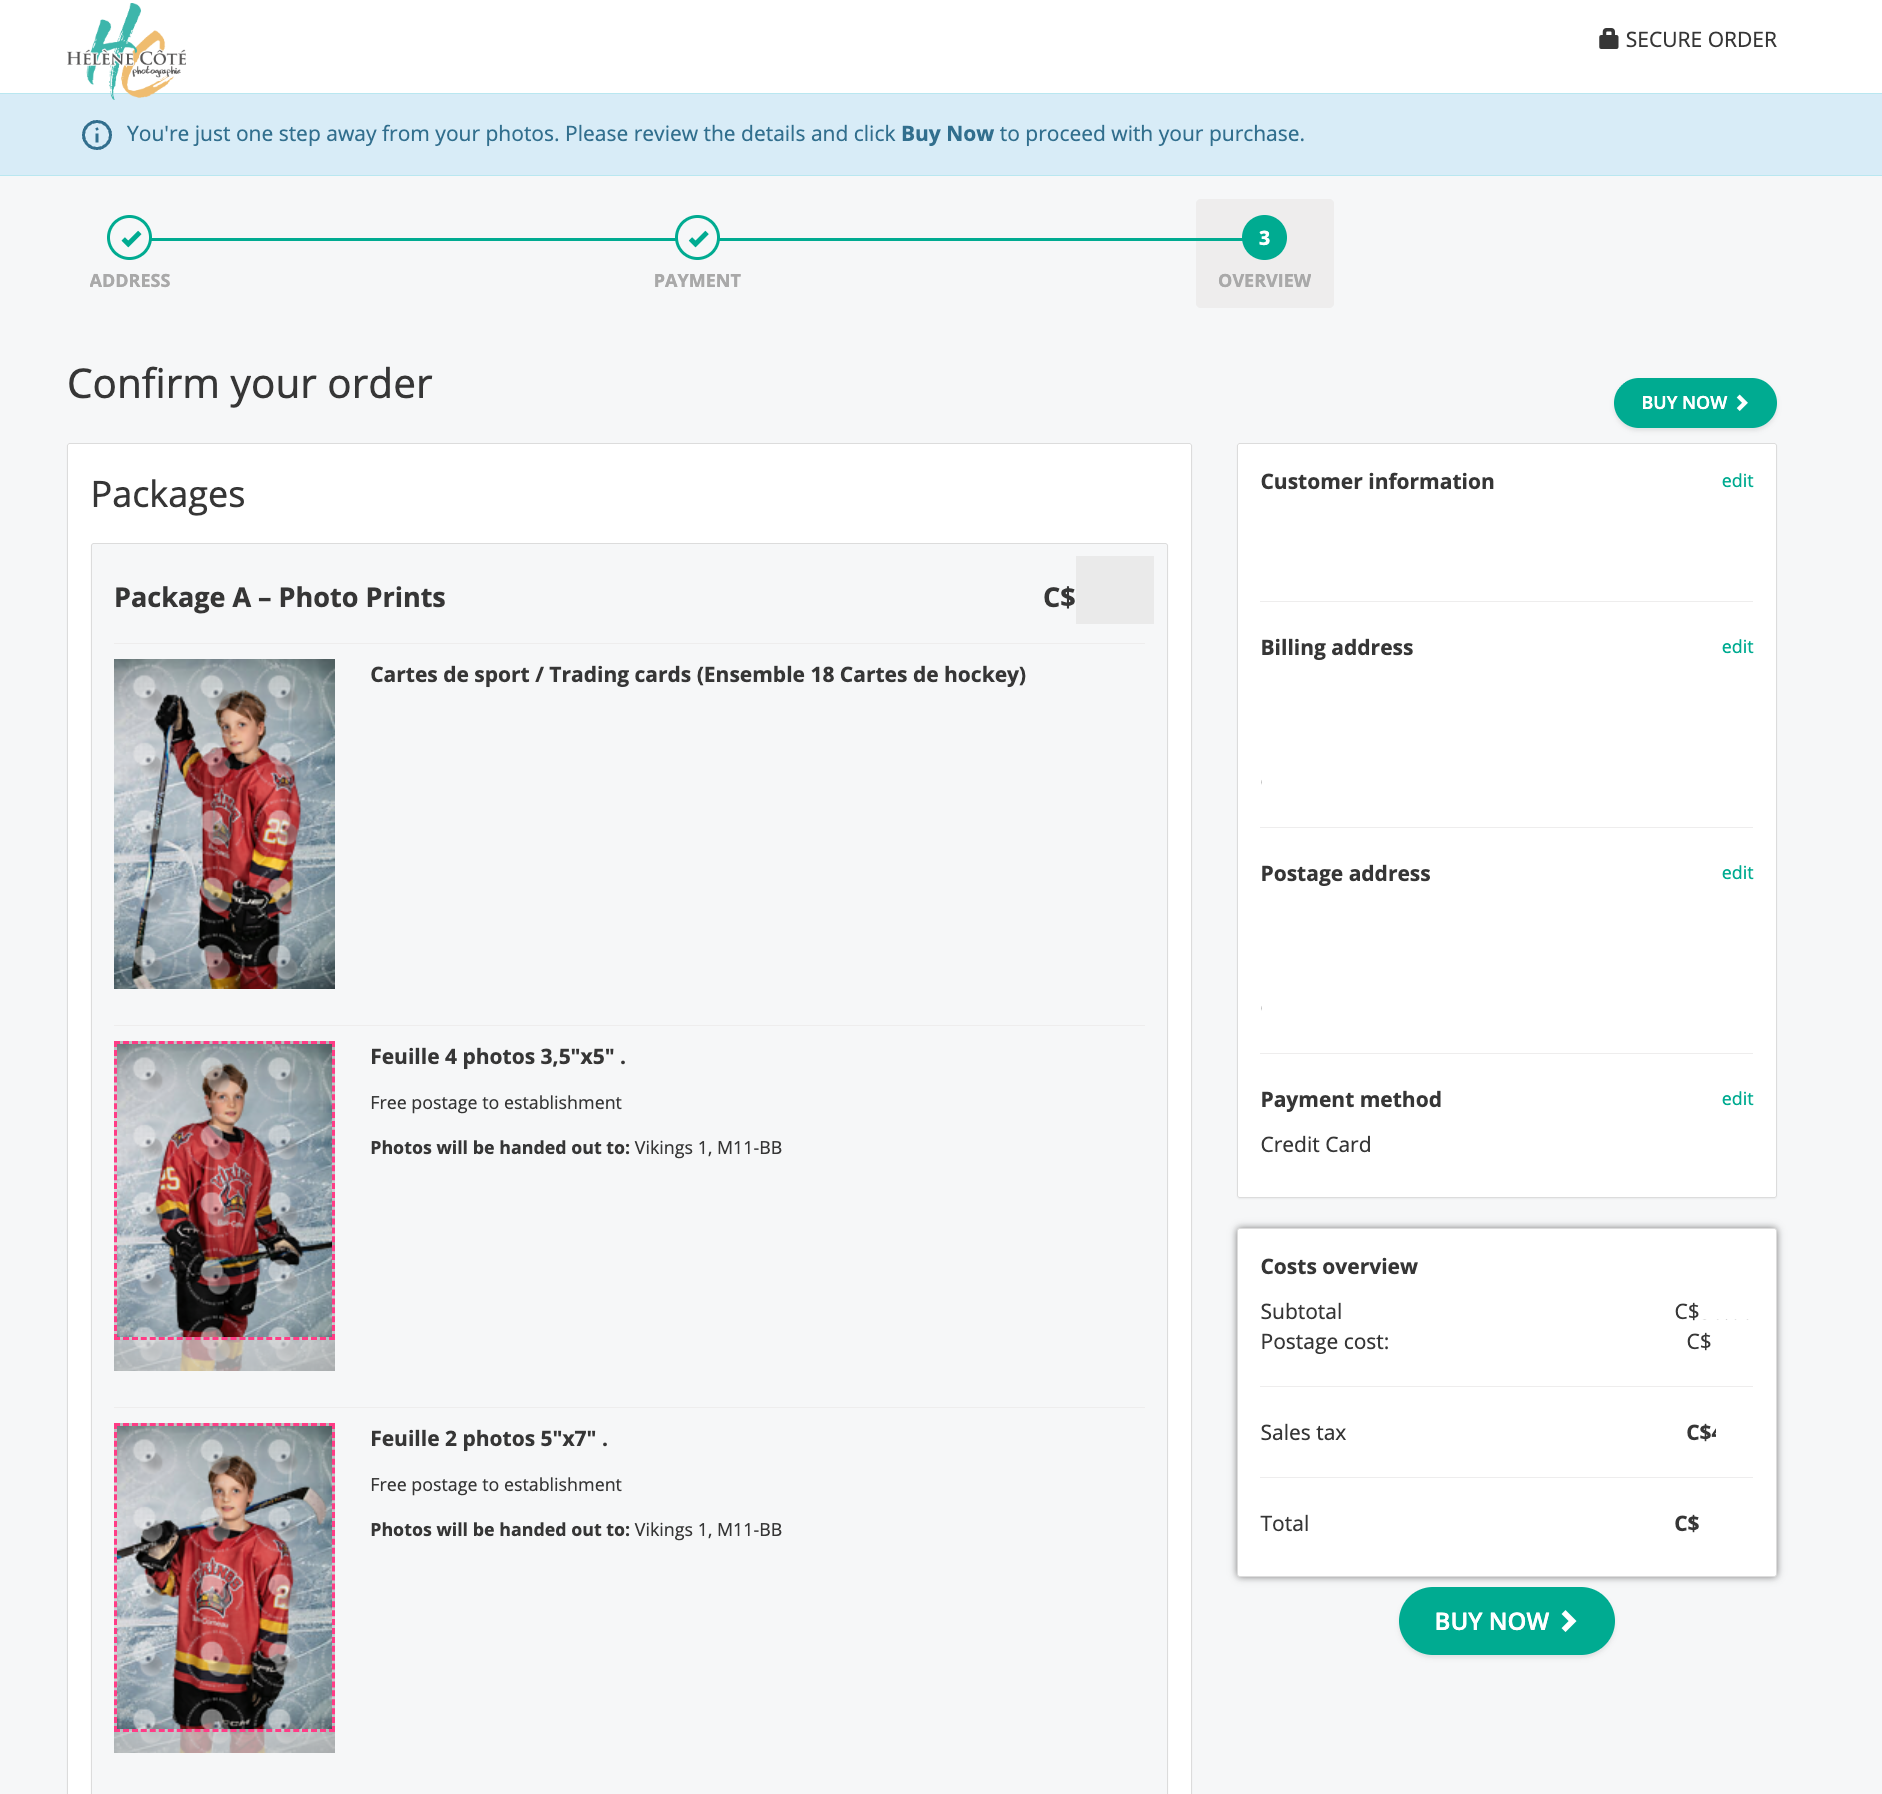
14- Order Overview
The final step — and an important one — is confirming your order. This is where you can review everything one last time (quantities, package type, photo cropping). Make sure to double‑check your contact information and billing address, and make any necessary changes.
Please note that no order modifications will be accepted after this step.
When you’re ready, click “Buy now”.
15- Order Status
You have completed your order!
If your photo package includes a digital file, this is where you will download your image(s). Please return to this page in about 12 to 24 hours, allowing time for the system to generate your files.
If there is any issue with your order, feel free to contact me by email.
